Brief Description: Continued Work on Horizontal Stabilizer
Ironed the back side of the stabilizer at about 250 degrees. Marked the edge with a pencil about 1 inch into the fabric. Applied a coat of glue around the edge inside the marked line. Allowed the glue to dry.
Removed the lower right wing aileron to prepare for covering. Cleaned the aileron with acetone removing all marks.
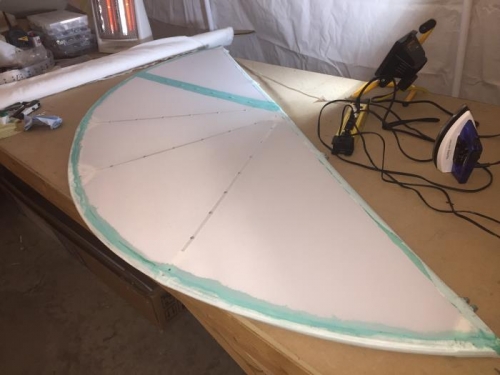
Checked the left over fabric from the trimming of the back side of the stabilizer and found that it was short 2 inches in covering the front side. Cut another length of fabric and trimmed to fit the front side. Laid the fabric over the stabilizer and secured the bottom to the frame between the hinges. Cut gaps in the fabric to fit over each hinge along the bottom edge. Pulled the fabric tight and ironed it in place along the edge. Put the stabilizer in the sawhorse and secured the fabric tightly around the top of the stabilizer. Trimmed the fabric back to the marked line with the pinking shears and ironed the edges in place. Ironed the top side of the fabric at 250 degrees. Conducted a seconded ironing using the regular iron at 300 degree across both sides of the stabilizer. Applied the fiber tape over the stitching holes on each of the cross braces. Using the soldering iron melted each of the stitching holes and the bolt holds on the back side. Installed a pop rivet in each of the stitching holes across the stabilizer. Marked 2 inch wide lines over the pop rivets and applied glue to the fabric within the lines for about 8 inches. Laid a strip of fabric tape over the pop rivets and applied glue to the first 8 inches. Used a shop towel to wipe the excess glue from the tape taking care to keep the tape in place. Continued applying glue to the fabric and tape and wiping down until all of the tape is covered. End of day.