Brief Description: Construction of Flight Controls
Aligned the control stick with the end bracket on one side and drilled a 3/16 inch hole through the bracket and stick. Installed a cleo to hold the bracket in place. Aligned the bracket along the control stick and drilled three more 3/16 inch holes. Installed two 3/16 inch pop rivets in the bottom two holes. Turned the control stick over and installed the second bracket with three 3/16 inch pop rivets. Drilled the second hole down from the top of the bracket through the control stick to ensure alignment through the control stick. Mounted two cable tabs on an AN 3 bolt and then installed it into the second hole down from the top of the bracket. Placed a second set of two cable tabs on the AN3 bolt and then the lock-nut.
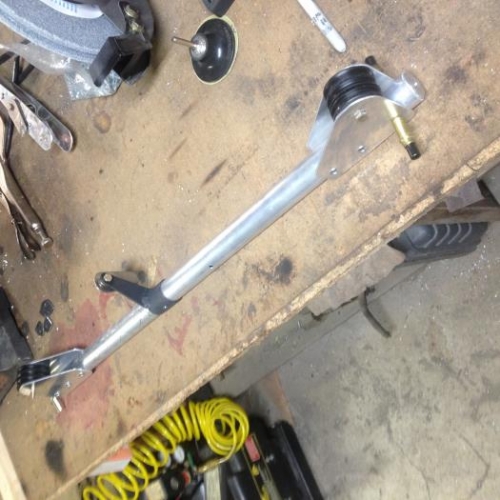
Measured the distance across the fuselage where the control assembly is to be mounted. Measured and marked the length on the 1 inch tube for the control assembly. Cut the tube to length with the chop saw. Sanded the cut end smooth. Assembled the pulleys between the mounting brackets with an AN3 bolt. Installed the treaded plug into one end of the control assembly. Installed one set of pulleys on the end of the tube and drilled a 3/16 inch hole through the bracket, tube, and into the treaded plug. Installed a 3/16 inch pop rivet through the bracket and into the threaded plug. Checked the alignment of the pulley bracket and drilled another 3/16 inch hole on the other side of the assembly. Installed a 3/16 inch pop rivet in the hole. Drilled two more holes on each side of the bracket and installed pop rivets in each.
Marked the position for the control stick mounting bolt hole in the tube. Slid the aileron control arm onto the control tube and positioned per the plans. Aligned the aileron control arm and the pulley assembly to be inline and drilled a 3/16 inch hole through the control arm and tube. Assembled the second set of pulleys and mounting brackets with an AN3 bolt. Installed the second threaded plug into the other end of the control tube. Aligned the control tube o