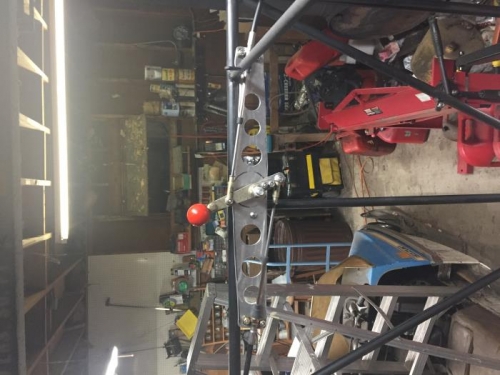
Brief Description: Completed Installation of Left Throttle
Modified the throttle arm by adding a 1 and 1/2 inch lower extension using two 1032 by 5/8 inch bolts. Drilled a 3/16 inch hole in the throttle arm 1 3/4 inches from the center of the mounting bolt. Also drilled a 3/16 inch hole in the lower extension 1 3/4 inches from the center of the mounting bolt. Removed the excess material on the mounting pipe which extended beyond the lower arm attachment flange. Mounted the throttle arm to the throttle plate using a 3/8 by 2 1/2 inch aluminum bolt and lock nut.
Test mounted the throttle plate to determine the locations of the tabs to the plate. Marked the position on the vertical fuselage pipe for that tab installation. Clamped a drilled and tapped tab to a sheet of 3 by 12 by 1/8 inch steel with the small vice-grips. Aligned the steel plate so the tab is in the marked position on the vertical pipe and clamped in place. Meg welded the tab in place. Aligned the throttle plate along the fuselage and drilled a 3/16 inch hole at the tab on the vertical pipe. Mount the plate to the fuselage with a 1024 by 1/4 inch screw. Drilled and tapped the forward existing tab to anchor the forward end of the throttle plate. Drilled a 3/16 inch hole aligned with the forward tab and installed a 1024 by 1/2 inch screw to hold the forward end of the throttle plate to the fuselage. Installed the engine throttle cable to the throttle arm and clamped it to the forward end of the throttle plate. Attached the right side throttle cable to the lower throttle arm and clamped the cable to the aft end of the throttle plate,
Checked the throttle travel and found that full throttle was not being achieved due to interferences with the throttle plate. Marked the area for later material removal. Removed the throttle plate from the fuselage and cables. Drilled six lighting holes through the throttle plate. Filed and sanded the holes smooth. Sanded the edges smooth and removed the material marked to allow full throttle application.