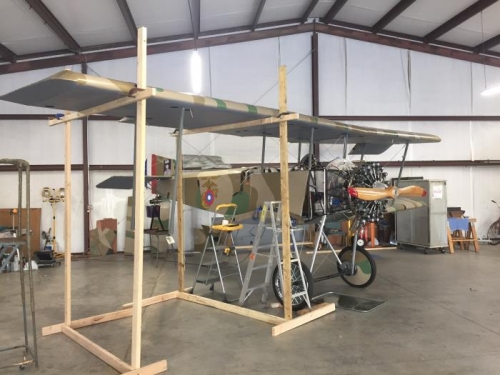
Brought back the wing struts after painting in my shop at home. Mounted the front strut to the wing with an AN3 bolt a washer and self locking nut. Had the socket slip off and fly off into the wing. This resulted in taking down the wing from the rack and shaking the socket into the front corner to remove it. Remounted the wing and installed the aft wing strut on the wing. Removed the brass barrell from each of the lift cables and screwed it onto the eyes on the top wing getting ready for the installation of the lift cables.
Raised the wing until it was level with the top wing of the airplane. Ironed the patch on the front inside surface of the wing. Got out the gray primer and painted the patch on the wing. Also painted the repair areas on the left wing trailing edges. Put lanolin on the spar stubs and moved the wing in place to join together. Had to use the strap between the center section spars to pull them together about 1/8 inch so they would fit together. Started the spars together and then removed the strap and finished fitting the wing to the center section. Used the come-along to pull the wings together and slid the ball pin into the front spar. The aft spar will be bolted during the next work day.