
|

|
|
|
Jerrys Web Site
|
Date: 5-5-2012
|
Number of Hours: 7.00
|
Manual Reference:
|
Brief Description: Left Wing Rib Installation
|
|
Wow -- made really good progress today. I completed the rib installation and have everything drilled out to #11. I attached and drilled the rear spar and the front main spar (not the extensions). My proceedure for drilling shims/ribs worked much better than the steps in the manual. First, I enlargened all the holes in the shims from #40 directly to #11 on the drill press. Then I enlargened the two outer holes on the spar where the ribs attach, i.e top and bottom, cleco'd the shims, and drilled the rest out. Then, I did the same for the nose rib and the main rib, one at a time, drilling out the two outer holes, attaching to the spar and then drilling the rest out. By doing it this way, I got a much better assembly than trying to drill them out with everything attached to the spar.
Photo 1 shows how I file a groove in each group of shims so when I disassemble and prime, I can get them back together the same way. I learned this the hard way on the right wing.
|
|
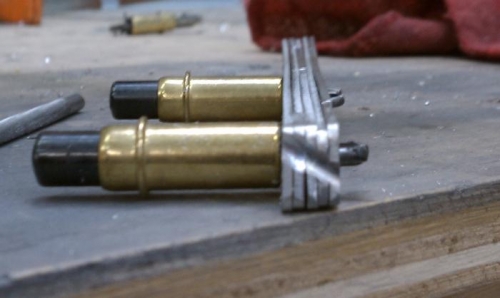
Shim groove for ID purposes
|
|
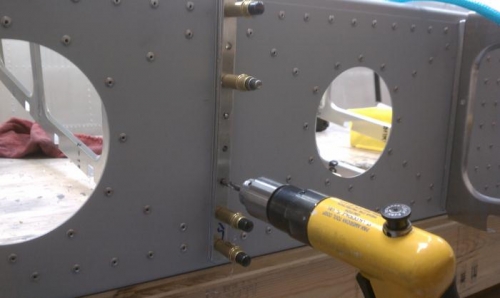
Using shims as template for enlargening the spar
|
|
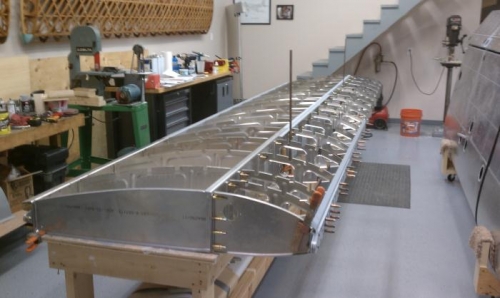
Days work completed
|
|
|
|
|
|
|
|
|
Copyright © 2001-2024 Matronics. All Rights Reserved.
|