
|

|
|
|
Jerrys Web Site
|
Date: 1-10-2012
|
Number of Hours: 8.50
|
Manual Reference:
|
Brief Description: Wing and Tank Skin Installation
|
|
A very full (no breaks) day. I started by finishing up the punch list, tying up wires, last minute checks, installing the strut attach fittings, and then touching up primer. That took approximately 3 hours.
Next, I mixed up a batch of proseal, and while Ruth applied it to the underside of the bottom tank skin, I applied it to the ribs/spars. We used small acid brushes with the bristles cut back to make them stiffer. In addition, I crimped each one at the end with a pliers to make sure the bristles didn't come out. We then put the skin on the wing, and jockeyed the ribs into position and cleco'd. I started at the root end, and put a 2x4 underneath the skin just outside the tank area. This kept the proseal from the skin and the ribs getting smeared. I moved it out enough to do each rib in succession on the tank. After cleco'ing the tank, we put cleco's in the rest of the wing skin.
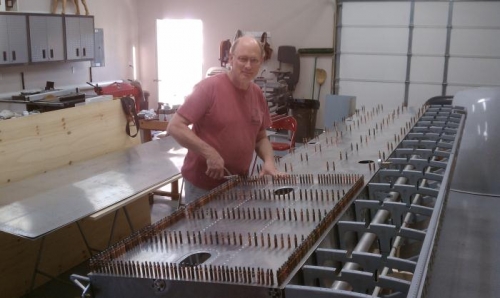
My neighbor, Mike, then helped us turn the wing over. I spent the next several hours working inside the tank, installing the stringer brackets, filling corners, and covering some previously set rivets. I will let the proseal set up a bit over night, and then turn the wing back over and pull rivets dipped in proseal.
In the meantime, I deburred and cleco'd the leading edge on the wing, starting on the top, the same progression as when I initially drilled the holes. When I turn the wing over in the morning, I'll proseal between the tank skin and the leading edge skin over the spar area, and then rivet the skin down.
|
|
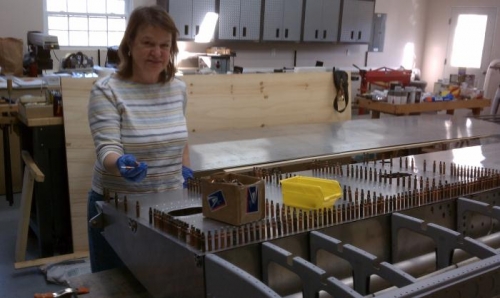
Ruth enjoying her first Proseal Adventure
|
|
Putting in the last cleco
|
|

Wing flipped, and installing leading edge
|
|
|
|
|
|
|
|
|
Copyright © 2001-2024 Matronics. All Rights Reserved.
|