
|

|
|
|
Jerrys Web Site
|
Date: 1-11-2012
|
Number of Hours: 7.50
|
Manual Reference:
|
Brief Description: Wing and Tank Skin Installation
|
|
Today, I had a neighbor come over and help turn the wing back over so the bottom skin was up. That's when I realized, I got ahead of myself last night -- I had cleco'd the leading edge skin on the top. Because of the wing strut fitting, I had to remove the cleco's and begin again from the bottom. Then, I riveted the tank skin, dipping each rivet in proseal. I then went ahead and riveted the bottom wing skin in place, except for the main spar and the trailing edge. I'll wait until I can level it up properly with the top wing skin in place.
This evening, I had my neigbor Chris and his son Christopher come over to help turn the wing back over. Christopher is in the first picture. I spent the rest of the evening cleco'ing the leading edge skin in place. I used a long 2x4 on the leading edge and some 2" web straps with blocking behind the rear spar to draw it up tight. I cleco'd everything except the last several holes, so I can slide the wing/tank skin in place.
Next, I'll proseal around the rivet tails in the tank, then begin to rivet the leading edge in place.
|
|
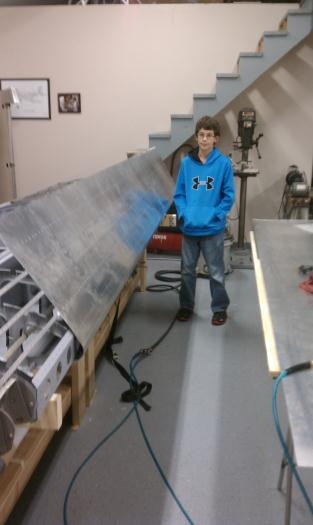
Neighbor Christopher helping to turn wing over
|
|
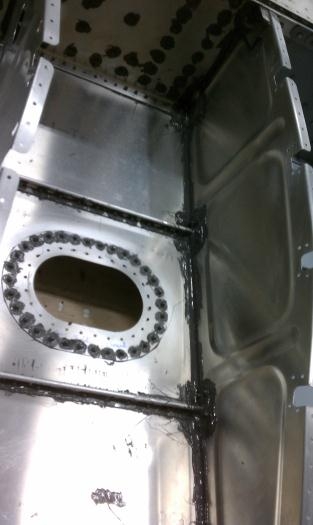
Inside view of outboard fuel bay
|
|
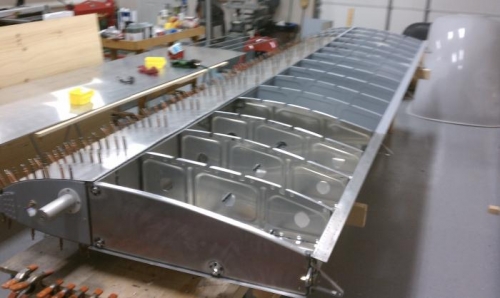
Wing ready for top skin
|
|
|
|
|
|
|
|
|
Copyright © 2001-2024 Matronics. All Rights Reserved.
|