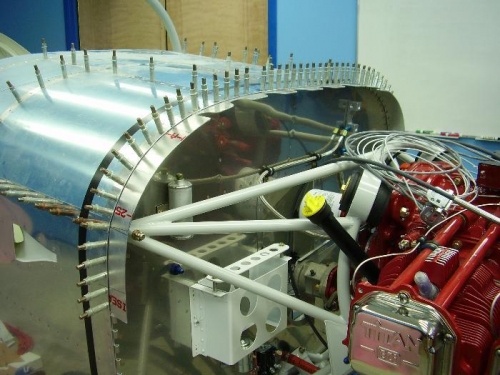
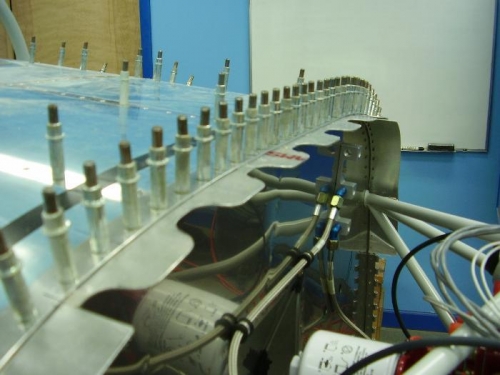
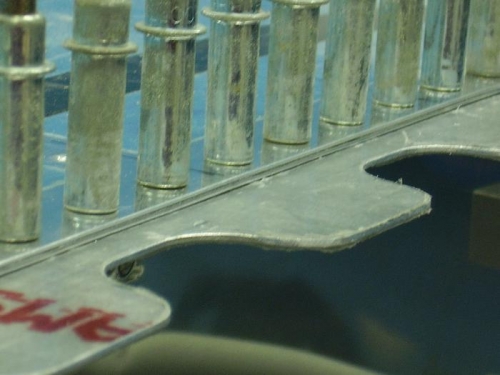
In order to fit the top half, the first thing that is needed is the flanges to support the cowl after it is cut to size. Note that I added electrical tape that is measured 2 inches back from the forward edge of the skins. This will be used to measure for the back edge of the cowls prior to cutting. I then started to cut the flanges out of .050" aluminum. I chose to make 3 flanges to support the 15 Sky Bolts that will be used on this edge. The top flange will support 7 fasteners; the side flanges will hold 4 fasteners each. I sized the flanges so that the joints between the top and the sides will be midway between the fasteners. The top flange was pretty straight forward to make; it was essentially straight. The side flanges were made through trial and error; the challenge being to fit them along the top and sides equally. The bend in the firewall dictates that a jog has to be cut into the flanges. This took some time and a lot of filing to get just right, but I'm satisfied with the result. I also had to add spacers between the firewall and the flange in order to allow for the thickness of the cowl. These shims were cut so that the joints did not fall on the flange joints. After the pieces were snugly fit and held in place with cleco clamps, I drilled the spacers and then the flanges and dimpled/countersunk the holes to accomodate the firewall dimples. Finally, I measured the flanges to cut the lighening scallops into them. These photos show the top flange scallops cut.