
|

|
|
|
Keiths Web Site
|
Date: 3-19-2010
|
Number of Hours: 6.00
|
Manual Reference: P 34-09, Steps 2,4
|
Brief Description: Fitting the canopy
|
|
The wing replacement parts arrived today, so when I can muster the necessary enthusiasm, I'll start taking the left wing to bits again.
Meanwhile, I spent much of the day screwing and riveting the canopy to the frame, and then screwing the aft window to the roll bar and fuselage. I managed all but the 11 aft screws myself. I'll need a helper for the last handful as I don't have 6 foot arms.
It's not clear from the plans whether the canopy should be screwed to the frame, on the bench. I think so. That's why I attempted to do it with the frame attached to the plane. And succeeded! Though't would probably have been easier on the bench. Everyone says do the screws "finger tight". But no-one explains that the screws go into locknuts. No way to do this with the fingers. I assume they mean tighten so that the screw and nut are still free to rotate. With the canopy permamently fixed, I had a further couple of trial lifts. I still need to shave a bit off the front, and widen those spacers at the back.
I had difficulty removing the protective paper from the aft window with it clamped to the structure with clecos. So after damaging a bit of paintwork, I finally admitted defeat and unclecoed enough of it to get the backing paper off.
Picture 1-3 show where I have got up to. There will now be a short interlude while the family takes priority...
|
|
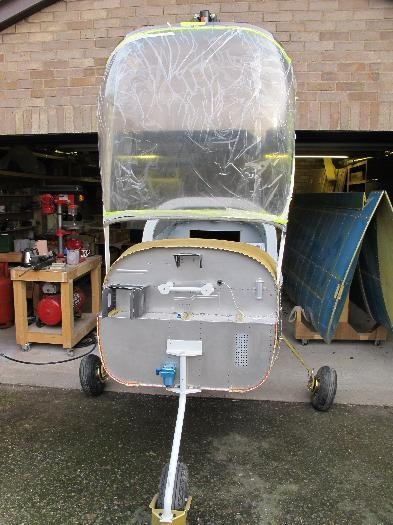
Canopy attached
|
|
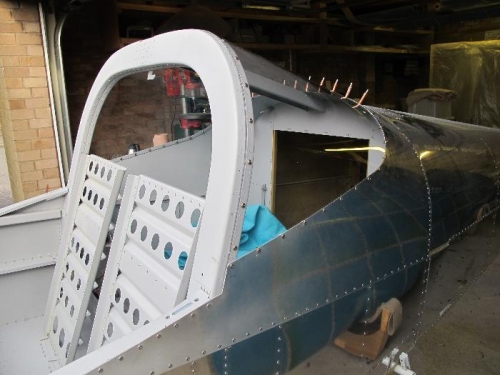
Aft Window almost attached
|
|
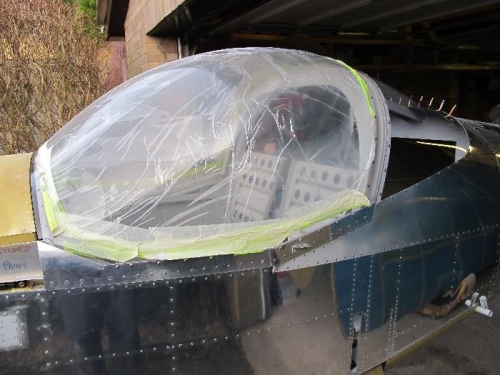
Full glazing
|
|
|
|
|
|
|
|
|
Copyright © 2001-2024 Matronics. All Rights Reserved.
|