
|

|
|
|
Keiths Web Site
|
Date: 11-2-2009
|
Number of Hours: 6.00
|
Manual Reference: P 23-06 Step 7
|
Brief Description: Attach fuselage side skins
|
|
It was good to be building again. And still the rain persisted, so I shut the garage door and worked inside.
Applying yellow guck took 30 minutes per side, and putting clecoes in every other hole also took 30 minutes per side. Finally I was ready to start riveting. Most rivets went in easily and work proceeded quite quickly. Too quickly, in fact. I did not spot that the rivets on the rollbar attach plate should be LP 4-4, so I had to drill 'em out. I used a number 30 punch to bang out the tails which worked fine, although one tail was lost somewhere in the structure. (Eventually retrieved when I turned the fuselage on its side).
Picture 1 shows everything clecoed up on the port side, and riveting in progress. Note the coffee cup, bottom right to keep me warm. It will soon be time to dig out the heater.
Picture 2 shows the port skin riveted on. There are still clecoes in some locations, as per plan, where we have further attachment to be done before riveting.
I had forgotten to rivet the nutplates around the "triangle" (Step 5). Fortunately, these could be done in-situ withough difficulty. It's all very well doing jobs out-of-sequence to make life easier, but it is very easy to miss steps.
I had previously prepared the cowl hinges, so I riveted these on too - Page 23-08 Step 4.
|
|
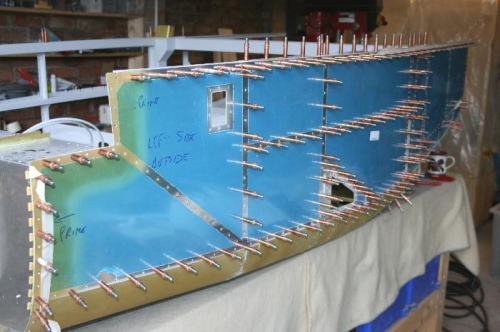
Port side clecoed
|
|

Port side riveted
|
|
|
|
|
|
|
|
|
Copyright © 2001-2024 Matronics. All Rights Reserved.
|