
|

|
|
|
Keiths Web Site
|
Date: 7-27-2009
|
Number of Hours: 7.50
|
Manual Reference: P 18-02 Steps 1-3
|
Brief Description: Prepare flaperon components
|
|
While waiting for my wing to be inspected, I thought I would press on with work on the flaperons (combined flaps and ailerons - very long control surfaces).
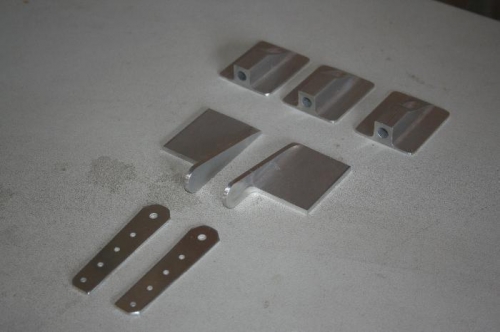
Picture 1 shows some parts that need to be prepped or fabricated. The top row are Pivot Brackets. You need 4 items two inches deep, but the aluminium bar I obtained was only 7.5 inches long, hence I could only make 3. Apparently early kits were shipped with insufficient material, so when doing your inventory ensure there's at least 8 inches. The photo doesn't show it clearly, but there's an angled bit to be taken off. It's cosmetic to reduce weight. The old saying "simplicate and add lightness" only partly works here. It's more complicated to remove the extra material, especially with no band saw. In the event, I cut off too much on two of them, so when I get the replacement bar, I'll probably remake the two I am not happy with. The parts also need to be drilled and tapped so that rod end beraings can be screwed in. The instructions call for a "Q" drill, which of course isn't in the required tools list, so I don't have one. Some more work to be set aside for a future occasion.
Second row also shows two mirror-image parts (Actuation Brackets) to be made from angle stock. These are complete apart from a hole to be drilled in the flange - not sure how to do this accurately, yet. These parts and the ones above have three-view drawings in the plans, but they are not quite to scale. I scanned the plans and imported the drawings into a Powerpoint slide. A bit of trial and error allowed me to enlarge the image and print it, so that I had scale drawings to work from. All of this fabrication was done with a hacksaw and a scotchbrite wheel.
The third row items just needed to be separated and cleaned up. Not shown is some prep work (fluting) on the nose ribs for the flaperons.
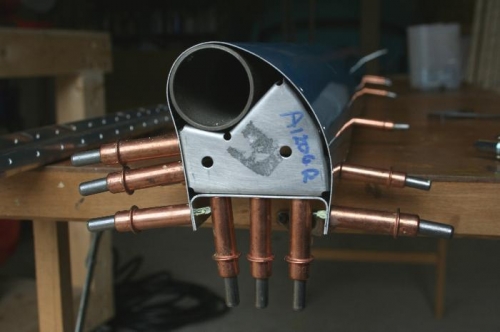
The second picture shows a trial fitting of the leading edge of the flaperon.
|
|
Flaperon parts
|
|
Flaperon counterweight
|
|
|
|
|
|
|
|
|
Copyright © 2001-2024 Matronics. All Rights Reserved.
|