Fresh from my success riveting the rudder I set to with the tailplane, another skeleton that had lingered for long enough "in the cupboard".
The plans call for clecoing top and bottom of one skin. The instructions were a bit vague, so I tried to cleco the second skin as well, before doing any riveting. There's not enough clecoes for three surfaces, let alone four, so I should have done one side at a time (not that it makes any difference).
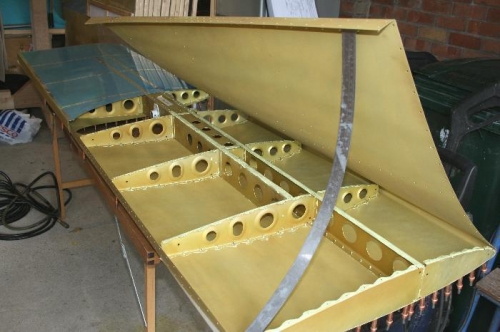
Picture 1 shows the first half ready for closing. The yellow gunge on the mating surfaces is not very obvious (though you can see it on my clothes!), but you can see that everything is primed.
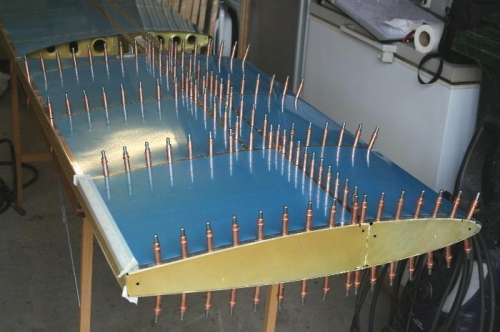
Picture 2 shows everything on the first side clecoed top and bottom and ready to rivet.
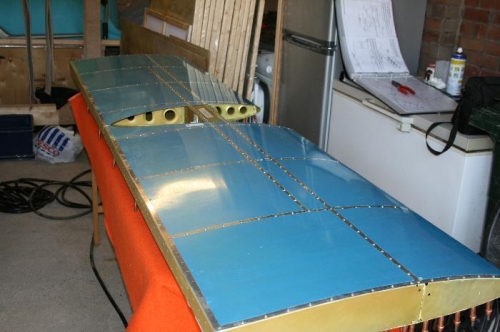
Picture 3 taken some time later shows both sides and both surfaces riveted, The orange blanket was to protect the bottom surface while I riveted the top.
Three comments: 1. Several people (myself included) had commented on some previous rivets having a rough top surface. I replaced the riveting gun head with one having a smaller hole (that's the second time I have downsized) and the results were much better. 2. 700 rivets in one day represents between 5% and 6% of all of the pop rivets to be done. Felt like an achievement, but boy does my wrist hurt from all the clecoeing. 3. I discovered later that everyone has to trim the edge of the skins where the tailcone fairing goes. It would be much easier to shave say 1/16 inch off now, before the skins are riveted.