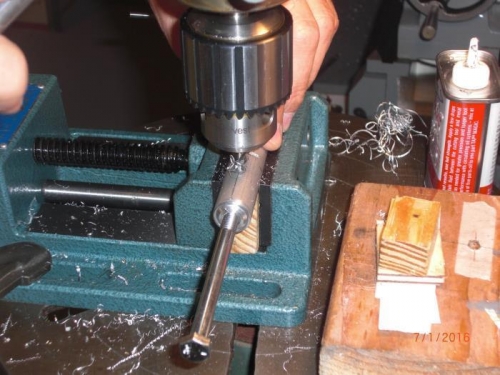
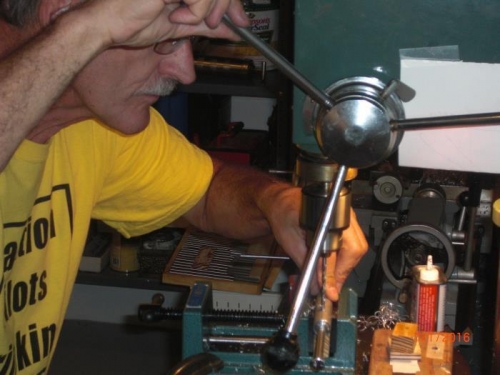
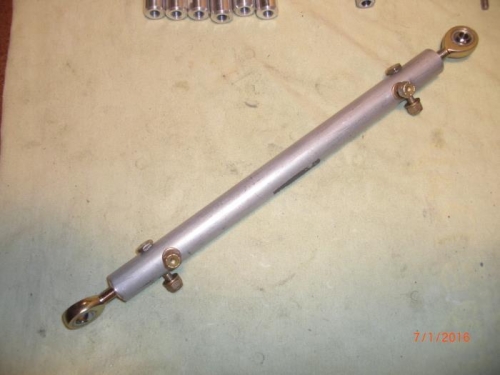
Today I started making the push pull control rods. Reviewd the drawings and located all components needed. First I finish the ends of the tubes on the lathe and put a small chamfer on them.I checked the location of the 2 holes to be drilled, but found out that the hole which is to be drilled 1-3/16" from the end of the rod will be right at the end of threaded hole of the inserts and I moved the hole to 1-1/8" to avoid this. Checked on this with Blake and since the inserts are not threaded to this depth. there is no interference problem with the rod ends and the 3/16" bolt securing the insert to the tube. I ended up with tubes from 2 different suppliers and the inside of one batch of tubes had a slightly smaller inside diameter and I had to reduce the OD of the inserts to allow them to slide into the 3/4" tubes. I first drilled a hole with the center drill, then drilled a undersized hole through tube and insert and then reamed the hole to size. I then left the reamer in the hole, moved the tube to drill the next hole at 1-1/2" location and turned the tube 90 degrees and checked the amgle with my digital protractor. After drilling all holes all edges are cleaned up and the bolts are temporaryly installed. Up from here it is just a duplication of the process and I got 4 of the 6 push pull tubes finished today.
center drilling irst hole
drilling 2nd hole with reamer from 1st hole still n place