
|

|
|
|
Greggs RV-4
|
Date: 11-8-2014
|
Number of Hours: 6.50
|
Manual Reference:
|
Brief Description: Nearly finished with LH tank!
|
|
Took advantage of the temperatures today, and tried to finish the left tank. I had to prep the inboard rib for install by scuffing, cleaning, and alodining its flanges. (The tank skin was already prepped) I then temp installed the inboard rib, so that I could cut the vent line to the right length, and mark the bends to line up with the hole I drilled for the bulkhead elbow that goes through the rib. I also had to notch the rear inboard stiffener to accommodate the fuel pickup tube. Once that was set, I sealed the rib in place. I then went back and double/triple checked the rest of the tank interior, for any pin holes, or other areas where fuel might later try to escape. Once satisfied with that, I temp installed the rear baffle, to use it as a pilot guide to countersinl the tank skin. When both the top and bottom row had been machine countersunk, I removed the baffle and prepared it for installation. NOTE: USE PLENTY OF SEALANT ON THE FOUR CORNERS OF THE TANK WHERE THE RIBS MEET THE BAFFLE!!!!! There are voids in the corners of the ribs, due to the forming process. This is the only place my first tank leaked air. I put enough sealant on this one to coat the corners well. Hopefully good to go this time. By the end of the day, the tank was sealed and riveted completely, except for putting on the fuel sending unit on the access cover and installing it.
|
|
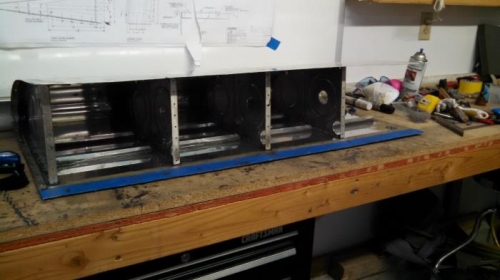
All ribs sealed and riveted except inboard.
|
|

Vent line and fuel pickup fabbed and installed.
|
|
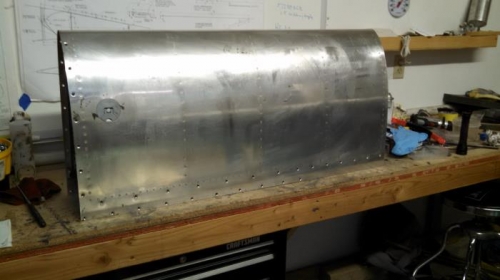
Complete! (Except for access cover and sending unit)
|
|
|
|
|
|
|
|
|
Copyright © 2001-2024 Matronics. All Rights Reserved.
|