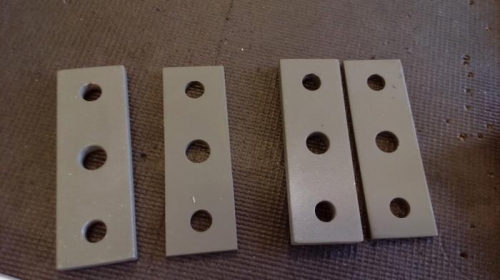
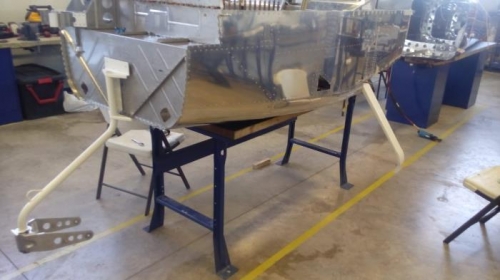
We worked on page 35iS/U-03 and did the steps 1 to 6 for both gear legs. In the step 1 we had to clean and then paint the parts U-1220-L/R, but, these pieces were already painted so we only checked the step, cleaned and continued with the following step. Next step was to clean and primer the parts U-01202A, U-01203B and U-01203E. Before installing we had to apply grease on the surface of the parts to prevent rust, after that we attached the parts and installed with the mentionated hardware. When all the bolts and nuts were placed the following step was apply the correct torque. Since we were waiting for the parts with primer to cure, we did the steps 1 to 5 of the page 35iS/U-08. We attached the Nose Gear Leg with the hardware mentioned on the page. Then, we had to apply the special grease. The bronze bushing SF-4048-12 mentioned on the page were previously installed for Van’s on the WD-01230-1. To place the security pin, we had to drill the part to prevent accidental rotation.