
|

|
|
|
Jim's Web Site
|
Date: 1-31-2009
|
Number of Hours: 2.00
|
Manual Reference:
|
Brief Description: left wing tip
|
|
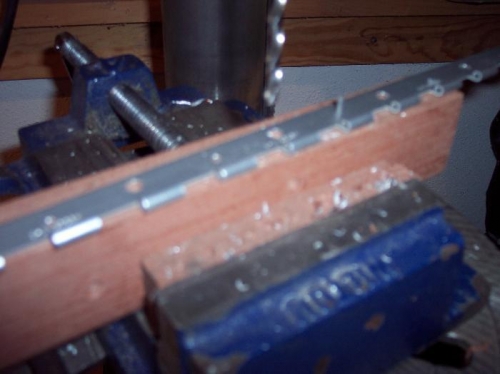
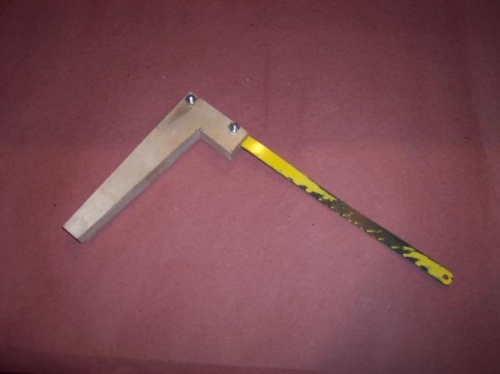
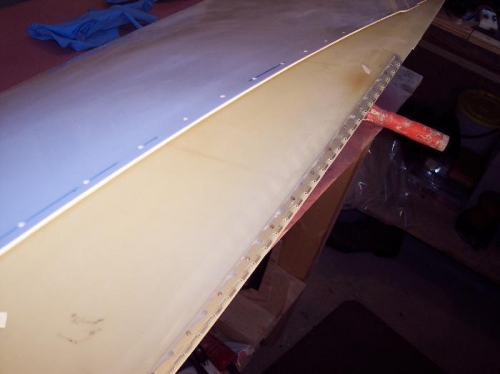
Friday evening I drilled the holes that go in between the rivets on the paino hinge. I used the drill press, small block, nail and clamp to drill the holes in between the rivet placement. These new 3/16" holes will be filled with fiberglass per the third photo below. After getting everything cleaned up, I installed the rivets and fiberglass on the hinge. The photo of the hacksaw is a tool I madeup for cutting the tip at the start of this whole operation over 20 hours ago. Keep the pin holes clean and any fiberglass needs to be remove right away. Tomorrow morning I will do the other side of the tip using the same process. Be very careful when you squeeze these rivets, it is very easy to deform an eye on the hinge, don't ask!
I used the soft rivets and it doesn't take much pressure to set them. Also, I rolled the rivet in fiberglass prior to install, rubber gloves. One pump from the 206 hardener and the 105 resin & a little flex and you have enough fiberglass to in stall one hinge. Here's the order: spread fiberglass on the tip edge, cleco hinge inplace, clean up eyes, set rivets, clean up eyes, run hinge pin, fill 3/16 holes with fiberglass, clean up eyes, run fiberglass along the inboard edge of the hinge, clean cleco's and squeeze, clean up runs, run hinge pin, clean up pin and eyes, you should be okay at this point! That is what I did.
|
|
|
|
|
|
|
|
|
|
|
|
|
|
|
Copyright © 2001-2024 Matronics. All Rights Reserved.
|