
|

|
|
|
Sonex 815 Build Logs
|
Date: 11-3-2007
|
Number of Hours: 0.00
|
Manual Reference: D01
|
Brief Description: Canopy installation
|
|
After letting the primer dry for a while (had lunch), cut the tip on the Sika adhesive. Cut the V-notch as marked on the tip. This allows the bead formed to be about 1/2" high. Ran the bead along the forward and aft bows, with gaps every 6" or so to allow for a spacer. Ran the bead along the inside of the side trims. With Carol's help, placed the canopy in position over the bows. The forwards bow I did not expect an issue because it sits on the trim piece of the windshield. So its height is set. The aft side has the frame bent to be a little low to allow for thickness of the Sika adhesive, so I expected that to sag down. It really didn't. After setting the canopy in place, first thing was to cleco the hinge side on. Have to reach in through the aileron pushrod hole to jockey the canopy frame a little to line up with the side trim. Got that side clecoed on, then did the latch side. Climbed up inside (have the seat out and a board on the floor where the seat was) and checked out how the bead of adhesive looked from the inside. Smoothed it out a little with a piece of cardboard, but overall it looks good. The canopy side is riding on the latch, making that difficult to move, so I stuck some cardboard between the canopy and latch to hopefully have it adhere a little closer to the side trim. If that doesn't work, then I'll have to take the latch angle off and shave the canopy some after it dries. Overall pretty easy, and the black band at the forward and aft bows should look pretty good from the outside.
|
|
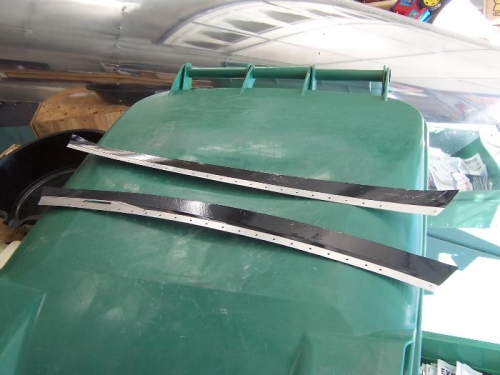
Side trims primed.
|
|
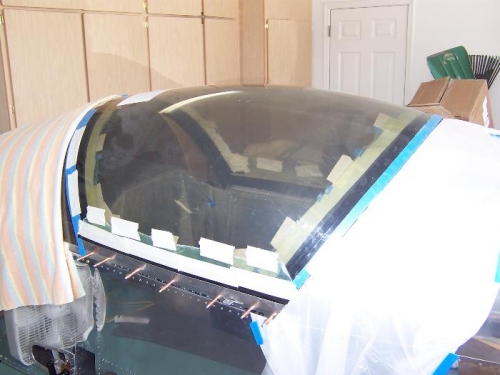
Glued in place.
|
|
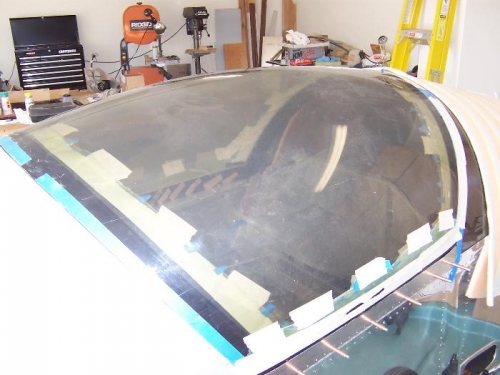
Glued in place.
|
|
|
|
|
|
|
|
|
Copyright © 2001-2024 Matronics. All Rights Reserved.
|