Brief Description: Building Leading Edge Bending Break
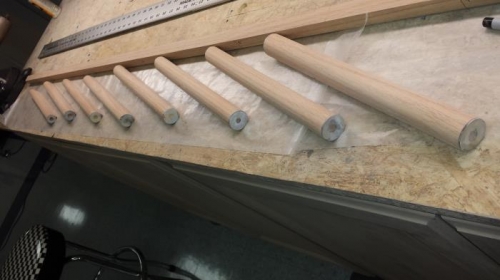
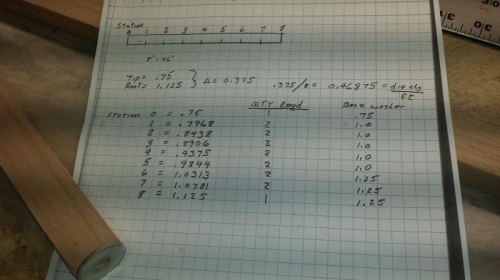
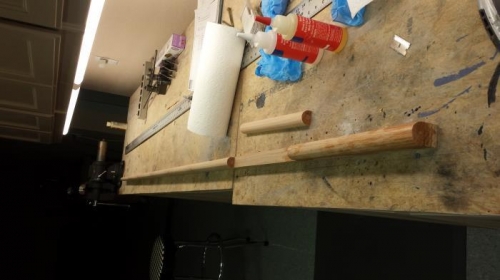
Resumed construction of the bending break for the leading edges of the horizontal tail skin and the wing. I'm going to use a wooden press similar to the one Dick Eaves shows on his drawings, however, I am going to try using a jack screw at each end of the form to apply the downward load rather than the hangar Bi-fold door as he did. Today was spent making the tapered nose strips. Two pieces of hickory were used. They were tapered per the plans to have a 3/4 diameter on one end, and a 1-1/8 diameter on the other. One of the tapered strips was cut into 1 foot sections and then washers were bonded on to each end to act as sanding guides so that a proper tapered radius could be added using a 1 foot table mounted belt sander. (The washers were resized such that they have the proper diameters for each end of the 1 foot section as needed by the taper.) Once all the sections were properly radiused, they could then be attached to the second tapered strip which acts as a guide for reassembly. This bonded assembly will then be attached to the 24 inch plywood blade that makes up the bending break. We will see how all this works.
Showing 1 foot sections with guide washers bonded to each end