
|

|
|
|
Harteveld, Chinook Plus 2
|
Date: 1-1-2017
|
Number of Hours: 12.00
|
Manual Reference: Steps 57 thru 60
|
Brief Description: Final empennage control hookups
|
|
Stole a few extra days off over the holidays, and was able to put in some cycles in the shop. My goal was to complete all empennage control cable hookups, and aside from a few outstandng questions, it looks like I was able to hit it.
Step 57 revolves around installation of the right and left Horizontal Stabilizers. Mine came complete from AM, tough I'm not sure whether or not that would be the case with a non-Quick build kit. Regardless, mide were beautifully manufactured and lined-up for a perfect fit.
Step 58 is really scary, as that is where you actually tie-in the Elevator to its control horn. Diretions were clear about the steps and the need for care. Elevator travel needs to be 27 degrees up and 15 degrees down. Thanks to Harbor Freigt for being open on New Year's Eve day so I could drop $4 for a little inclinometer. Made all the difference.
Step 60 utilizes a push/pull tube to tie the front and rear joysticks together in control of the Elevator. Mine was, again, a really nice fit. I did get a scare, however, when the travel distance of the rear stick prevented the Elevator from reaching its required 27 degrees of up travel. Some fine adjustment on the length of the push/pull tube fixed that problem. I still might need to scootch the front seat back a half-inch or so in order to maximize the Elevator up travel - will wait to see if it is truly a factor before making that move. The seat will be easy to reposition, regardless.
|
|

Horizontal Stabilizer
|
|
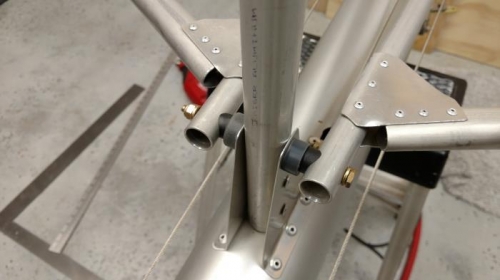
Horizontal Stabilizer Junction
|
|
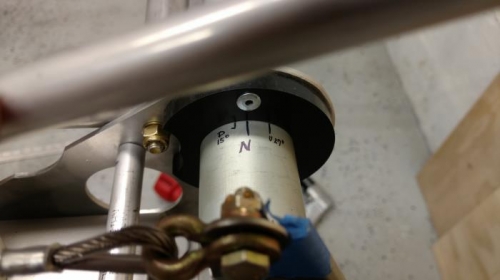
Elevator Control Horn Installation
|
|
|
|
|
|
|
|
|
Copyright © 2001-2024 Matronics. All Rights Reserved.
|