
|

|
|
|
Building Juliette Whiskey
|
Date: 8-21-2006
|
Number of Hours: 1.50
|
Manual Reference: Section 6
|
Brief Description: Servo mount & trailing edges
|
|
Tonite, again is my late night at work, so I only got a little time on the plane. I riveted the trim tab servo motor mounts on to the cover plate. I will wait until the left elevator is totally complete before I mount the servo unit in place. I did, however, screw the plate on to the elevator.....smooth clean fit!! I then started to set up the mounting angles for the trailing edges I've been putting off.....till now. I need to do all three trailing edges at the same time, since I have only one tube of pro-seal. Once I mix the 2 parts of the pro-seal, I will only have a limited amount of time to apply it, so I want to have all three trailing edges mounted in their jigs and ready to go. I will need to use all three work benches, so I will have to move the big table tools off the fabricating bench. Tonight, I drilled several holes in a piece of aluminum angle and then countersunk the holes. I lined the angle up to the top of the bench and screwed it in to the side, so the top of the angle and the top of the bench were level with each other. The bench is very level, so the angle was too. I will do this to the other two benches and then match drill the trailing edges and cleco them to the angle. After applying the pro-seal, they will sit for about 3 days to cure, then I will rivet them and the trailing edges will be done and PERFECT!!!! (I hope). One bench down......2 to go!
|
|
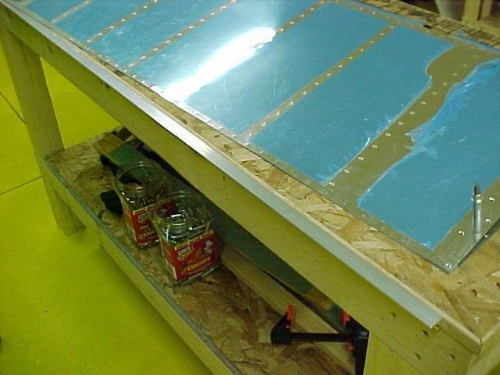
Angle aluminun screwed to bench for rudder trailing edge
|
|
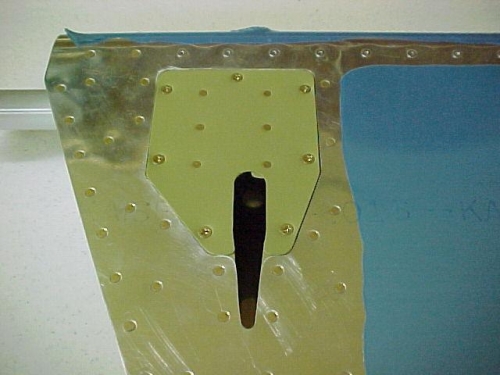
Cover Plate screwed on bottom of left elevator
|
|
|
|
|
|
|
|
|
Copyright © 2001-2024 Matronics. All Rights Reserved.
|