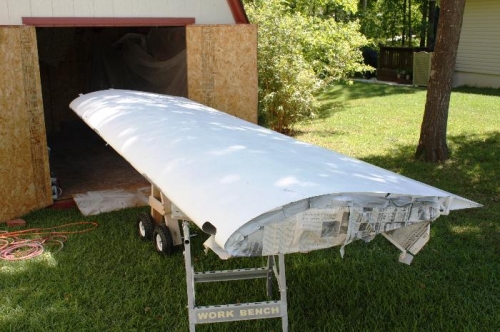
Brief Description: Completed Left Wing P{aint and Engine Baffle
04/17/2011 FF2 COWL BAFFLE FF2-6
I continued wiring the X-10 for the Pilot and Copilot seat heaters. The X-10 aircraft really looks nice and a lot closer to completion with the nice leather interior completed. Wow, it finally looks like a first class aircraft !!! Nothing cheap about it.
And, completed finishing the (I have it stored in the garden shed for safe keeping), by removing all the shinny alodine surface and sanded with 400 grit sand paper and primed with DTM, let it dry and then sanded again. Tomorrow I’ll give it one more final primer coat and sand. Then it will be ready for the finishing coat of Jet Glow White.
And returning to the Van’s construction manual. I again began work on the Firewall Forward sections.
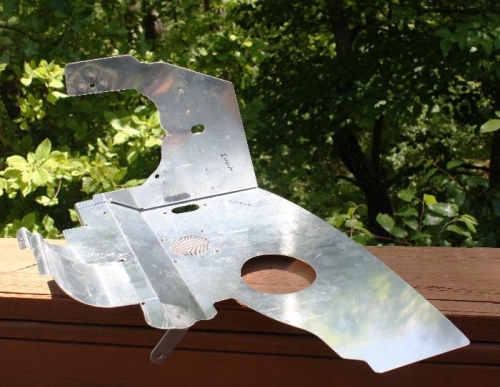
Step 1 --- I clecoed the ZCB-1007B Aft Right Support Bracket to the CB-1007A Right Aft Case Baffle. Then final drilled all the #30 the holes in common. Step 2 --- Clecoed the CB-1008A Cylinder 5 Baffle for the CB 1007A Right Aft Case Baffle and then final drilled all the #30 the holes in common.
Step 3 --- Located the CB—1003C Doubler Plates and CB—1008B Stiffener to the CB-1008A Cylinder 5 Baffle and again then final drilled all the #30 the holes in common.
Step 4 ---I drilled two #12 holes in the two #30 pilot holes and then enlarged the two remaining #30 holes to 3 / 4 inch with a Unibit.
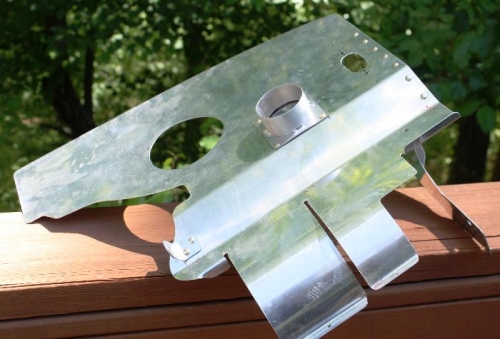
Step 5 --- I located the VENT DL-03 Scat Tube Flange and placed on the aft face of the CB 1007A Right Aft Case Baffle as shown in figure 1 and match drilled #30 the four holes.
Step 6 --- Then I traced with a black felt tipped marker the VENT DL-03 Scat Tube Flange onto the CB 1007A Right Aft Case Baffle. The using a punch and die set I remove the area I just traced.
Step 7 --- I now disassembled the entire assembly and deburred all edges and dimpled the rivet holes in the CB1003C Doubler Plates and the adjoining holes in the CB-1008A Cylinder 5 Baffle. Step 8 --- I then riveted the CB 1007B Aft Right Support Bracket to the CB 1007A Right Aft Case Baf