Brief Description: I Cut-out template on the U-1018A Nose Gear Leg Fa
SECTION 48-20
Nov. 26th, 2010
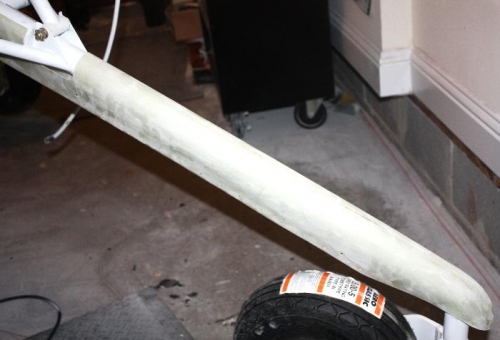
Step 1 … I cut out the template found on page 48-23. Step 2 … I placed and then taped in place the cut-out template on the U-1018A Nose Gear Leg Fairing as described in figure 1. Then after measuring carefully I cut were necessary with the Multi-Tool. Step 3 … I glued the other small Forward Template to a piece of hard and stiff paper. I traced the image of this onto the nose of the U-1018A Nose Gear Leg Fairing. Step 4 … I removed a 1 inch wide strip of fiberglass from the top center of the U-1018A Nose Gear Leg Fairing as shown in figure 2 with the Multi-Tool. This part of the U-1018A Nose Gear Leg Fairing will be attached to the WD-1017 Nose Gear Leg Assembly by a stainless steel screw clamp. Step 5 … I attached the U-1018A Nose Gear Leg Fairing to the WD-1017 Nose Gear Leg Assembly to obtain a best fit attitude. I carefully checked for clearance between the Nose Gear Leg Fairing and the U-1013 Nose Wheel Fairings. I trimmed until I had not greater than .25 inch. Step 6 … Because the U-1018A Nose Gear Leg Fairing is made of a translucent type of fiberglass I was able to mark the outline of the small WD-1017 Nose Gear Leg Assembly brackets by site alone. And now removed the U-1018A Nose Gear Leg Fairing from the WD-1017 Nose Gear Leg Assembly.
Time 2 hours.
Testing the Fit of the U-1018A Nose Gear Leg Fairing