Brief Description: I checked the alignment of the U-1013 with the flo
SECTION 48-18 Nov. 24th, 2010 Step 1 … I cut the slot location at the top of the U-1013A Wheel Fairing Front for the pipe Nose Gear Leg. Step 2 … I checked the alignment of the U-1013 with the floor at exactly 8.5 inches to the Front Wheel Fairing Centerline. Then I drilled with a #40 drill bit through clear or translucent Front Wheel Fairing and into the U-1013C L/R Brackets at the already cross marked area of the brackets. And then I drilled a 1 inch diameter hole for the Tow Attachment Bar with a Uni-bit. Step 3 … In this step I tapped the U-1013C L/R Brackets #40 holes with a 6-32 tap. Step 4 … I applied some clear tape as a release agent where I did not want the Super-Fill epoxy material to stick to the U-1013C L/R Brackets. The purpose of the Super-Fill material is to allow for a more correct fitting interface between the brackets and the wheel fairings. Step 5 … After the Super-Fill epoxy material cured I removed the U-1013A/B Wheel Fairings from the U-1013C L/R Nose Wheel Fairing Bracket. Step 6 … In this step I final drilled #19 the holes and then I attached the K1000-08 nutplates to the fairing bracket with AN426AD3-4 rivets. Time about 3 hours because I was working slow.
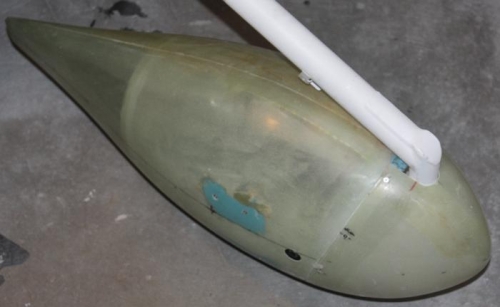
U-1013A Wheel Fairing Front and Rear Clecoed Together