Brief Description: U-1057B L/R Rear Wheel Fairing with Epoxy/Flox
SECTION 48-06
Oct 31-2010
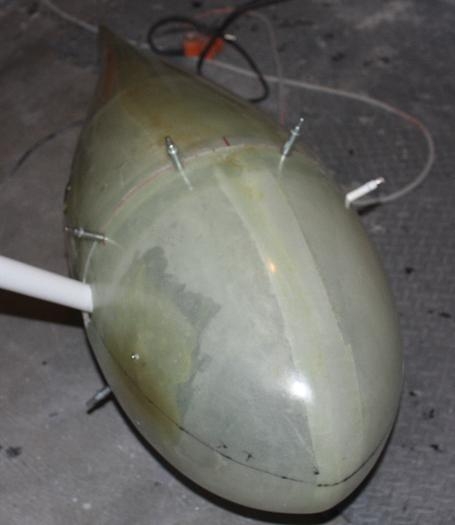
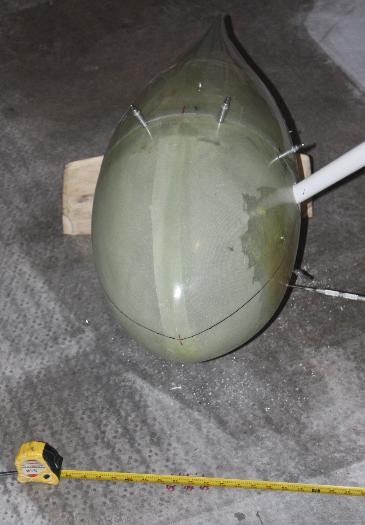
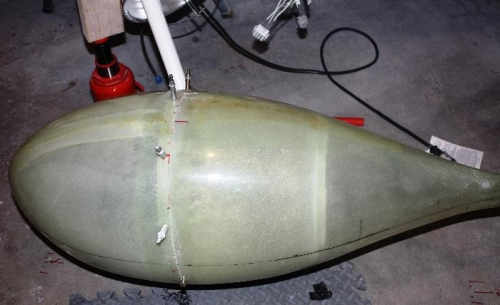
Step 1 … I placed the U-1057B L/R Rear Wheel Fairing in the tire and bracket assembly as shown in figure 1. Then I drill a #30 pilot hole at the intersection of molded step and U-1004B Nut Extension and then final drilled with a 1 / 4 “ drill bit. Step 2 … Using a light laser and a couple brass plumb bobs I located the aircraft center line, and marked the floor with a chalk line used in the construction industry. Then after placing the Wheel Fairing back onto the tire assembly I aligned the front and back of the Wheel Fairings to exactly 44 inches off center line and 11.75 inches high. Step 3 … Now that I have the perfect alignment of the Wheel Fairings set, I drilled with a #30 drill bit through the translucent U-1057A Wheel Fairing Front and Rear into the already marked bracket for the four nutplates that will need to be installed later. After removing the Wheel Fairings, I then with #80 grit sand paper roughen up the inside surface of the U-1057A Wheel Fairing Front and Rear at the places I have just drilled. Now tape over the drilled #30 holes with clear tape from the outside then using Aeropoxy and some e-cloth add about 3 layers of fiberglass and allow too cure overnight. Then remove the tape and redrill through the #30 holes again, at the four places per side. Step 4 … I located a 6-32 tap in my tool box and tapped all four #30 holes in the brackets. Reattach the Wheel Fairings using the correct 6-32 screws. Step 5 … I insured that the fit of both front and rear fairings aligned perfectly. Then after removing the Wheel Fairings, protect the 6-32 drilled screw holes with wax. Then add tape to the wheel fairings brackets to prevent the epoxy/flox mixture from bonding to the surface. Now I added a peanut butter consistency of epoxy/flox that reinforces the Wheel Fairing shell to the wheel bracket. Do this a couple times until enough epoxy/flox is achieved to help secure the bracket to the Wheel Fairing.
Time about 8 hours because I was working slow in or