
|
|
Conrads X-10 Build Log
|
Date: 1-29-2010
|
Number of Hours: 3.00
|
Manual Reference: 39-7, Step 1 to 4
|
Brief Description: SECTION 39 CONTROL SYSTEM, Page 39-7, Step 1 to 4
|
|
SECTION 39 CONTROL SYSTEM, Page 39-7, Step 1 to 4
Step 1, I located both the WD-1012-L/R Control Sticks, then inserted them into the WD-1011-L/R Control Stick Base and drilled a #12 Match Drill hole into the two.
Step 2, Final drilled the WD-1010 Control Column tow places with a 1/4” drill bit.
Step 3, Final drilled the WD-1011-L/R Control Stick Base using a #12 drill as shown in figure 3.
Step 4, Install the WD-1010 Control Column to the F-1033-L/R Control Column Mounts as shown in figure 4.
Time about 3 hours because I also primed and painted the Control System hardware .
|
|
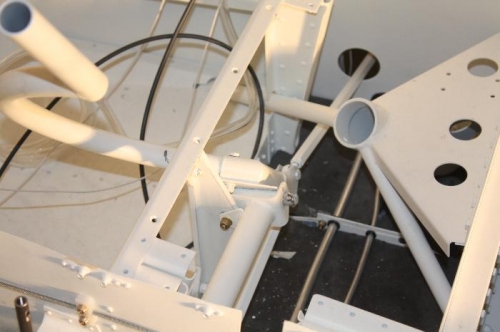
Co-Pilot Control Stick in Place
|
|
|
|
|
|
|
|
|
Copyright © 2001-2024 Matronics. All Rights Reserved.
|