
|

|
|
|
Conrads X-10 Build Log
|
Date: 1-30-2010
|
Number of Hours: 1.00
|
Manual Reference: 39-10, Step 1 to 3
|
Brief Description: SECTION 39 CONTROL SYSTEM, Page 39-10, Step 1 to
|
|
SECTION 39 CONTROL SYSTEM, Page 39-10, Step 1 to 3
Step 1, I fabricated the gauge as shown in figure 1.
Step 2, Using the custom marker gauge I positioned the WD-1010 Control Column and clamped the F-635 Elevator Bellcrank in the neutral position. Using a AN4 bolt through the ¼ inch hole in the gauge adjust the F-1089 and/or F1090 Elevator pushrod lengths as required. Perform a final check of the control system once the elevators are installed on the aircraft at the airport hangar. Specifically the WD-605-L/R Elevator Horns should contact the elevator stops before the control sticks make contact sticks make contact with a any other structure. This final step is delayed until final assembly of the aircraft.
Step 3, Now for final assembly of the F-189 Elevator Pushrod Assembly to the WD-1010 Control Column using AN4-11A bolt, AN960-416 washer, AN365-428 nut and torque to 75 inch pounds. Be sure to loop the safety wire around the bearing capturing the AN4 bolt. See figure 3 for details.
Time 1 hour.
|
|
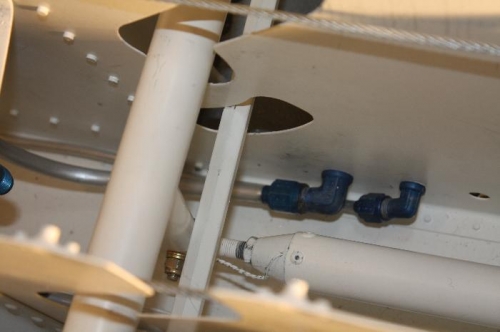
SAFETY WIRE in Place
|
|
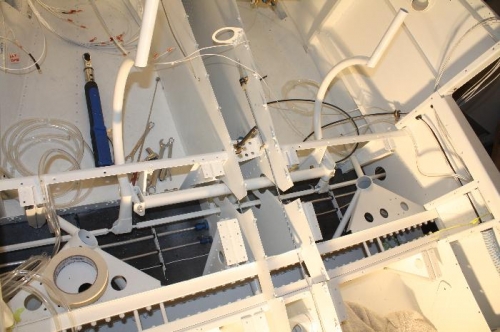
Control Colums and Associatred Elevator Pushrods Installed
|
|
|
|
|
|
|
|
|
Copyright © 2001-2024 Matronics. All Rights Reserved.
|