
|

|
|
|
Conrads X-10 Build Log
|
Date: 9-11-2009
|
Number of Hours: 4.00
|
Manual Reference: 28-15 step 1 to 6
|
Brief Description: Section 28, FWD FUSELAGE RIBS, BHDS, BOTTOM SKINS
|
|
Section 28, FWD FUSELAGE RIBS, BHDS, BOTTOM SKINS … Page 28-15, steps 1 to 6
Step 1, Located the F-1067A Seat Floors and F-1067D Seat Floor Attach Strips and separated the two parts. Then after sanding smooth the sides I reamed the screw holes with #19 drill.
Step 2, Clecoed the and F-1067D Seat Floor Attach Strips to the F-1067A Seat Floors. Final drilled with #40 drill the holes in common.
Step 3, Final drilled all the #40 and #30 holes and countersunk where necessary for the head of the AN426AD3 rivets.
Step 4, Un-clecoed the and F-1067D Seat Floor Attach Strips to the F-1067A Seat Floors and deburred the edges and holes, removed the “shinny” finish and cleaned with Acetone in preparation for primer painting with DTM primer.
Step 5, After allowing the primer to cure fully I riveted the nutplates and the F-1067D Seat Floor Attach Strips to the F-1067A Seat Floors as shown in figure 3.
Step 6, Labeled the completed assemblies Left and Right and put aside until a later date.
Time about 4 hour.
|
|
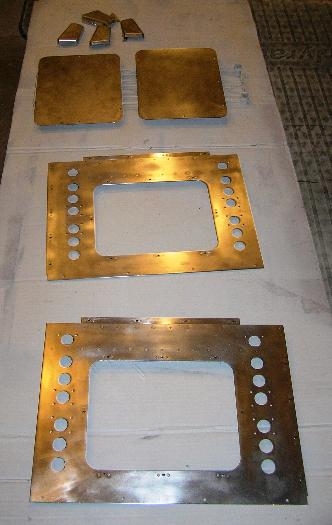
Step 4 Parts Deburred and Ready for Priming
|
|
|
|
|
|
|
|
|
Copyright © 2001-2024 Matronics. All Rights Reserved.
|