Brief Description: FL-1004-L Nose Rib and the FL-1007 Hinge Bracket a
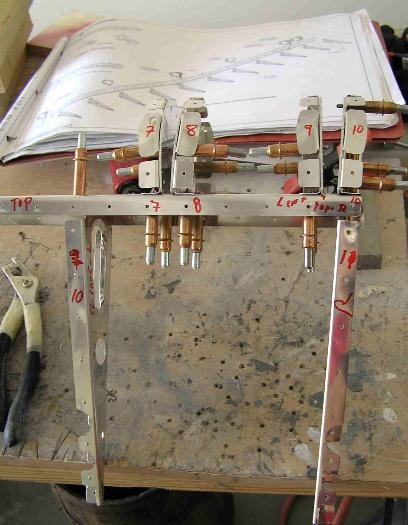
05/10/2009 …. 22-3, Step 1 to 4. Step 1, Clecoed the two previously created Left Hinge Pair Ribs sub-assembly that are made up of the FL-1004-L Nose Rib and the FL-1007 Hinge Bracket as shown in Figure 1. Then Final Drilled #30 the 1/8 inch holes in common. Step 2, Basically the repeat of Step 1 but you use the Hinge Bracket FL-1007-R (right) and FL-1004-R (right) Nose Ribs. This created the right Hinge Pair Rib Sub-Assembly. Step 3, This describes a method for lighting the FL-1008 Aluminum Spacers but I passed on this since they are only made of aluminum and weight saving would be less than 1 pound. Step 4, I Clecoed together the Center Hinge Sub-Assemblies for both Ailerons following Figure 4. First I placed the two FL-1008 Spacers between the FL-1007-L and FL-1007-R Hinge brackets and added the FL-1004-L/R Nose Ribs on each side of the Hinge Brackets. Then Final Drilled the nine 1/8 inch holes common to all six assembled parts. Finally disassembled all the parts and debured and re-assemble using clecos. Time for all of this (both Left and Right Ailerons) about leisurely 4 hours.
The FL-1004-L Nose Rib and the FL-1007 Hinge Bracket
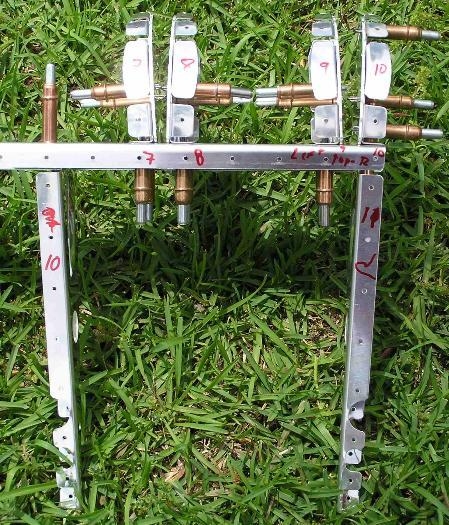
The Hinge Bracket FL-1007-R (right) and FL-1004-R (right) Nose Ribs Sub-Assembly's on the Grass