
|

|
|
|
Conrads X-10 Build Log
|
Date: 9-18-2009
|
Number of Hours: 4.00
|
Manual Reference: 29-5, Steps 1 to 4
|
Brief Description: Section 29, FUSELAGE SIDE SKINS …. Pages 29-5, Ste
|
|
Section 29, FUSELAGE SIDE SKINS …. Pages 29-5, Steps 1 to 4
Step 1, This is where the actual Roll or Bend angle is accomplished. I aligned the Clamping Block of wood edge along the start of the Roll Line as shown in figure 1. I used two Vice Grips pliers attached at different places to the F-1070A and B Roll Construction Angles I clecoed the #40 hole in the F-1070-R Mid Side Skin. The used two other C-clamps to firmly hold the entire assembly to a work bench in preparation for the “roll”.
Step 2, I grasped the aft vice grip and rotated and pushed inward and down at the same time until I obtained approximately 60 degree bend angle specified in figure 2.
Step 3, I removed four clecoes from the forward area of the F-1070A and B Roll Construction Angles and grasped and rolled the forward vice grip and then “banged” with a rubber mallet the forward area of the skin to create a nice crease in the skin. This sound bad but in reality was quite easy once you set up everything according to the plans.
Step 4, I placed the F-1070-R Mid Side Skin on the side of the fuselage, clecoed and check the fit. The work is perfect. Now repeat for the other side skin F-1070-l Mid Side Skin.
Time about 4 hours.
|
|
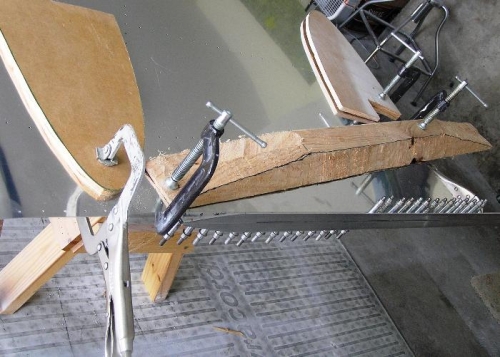
Setting Up for teh Roll/Bend Angle of 60 Degrees
|
|
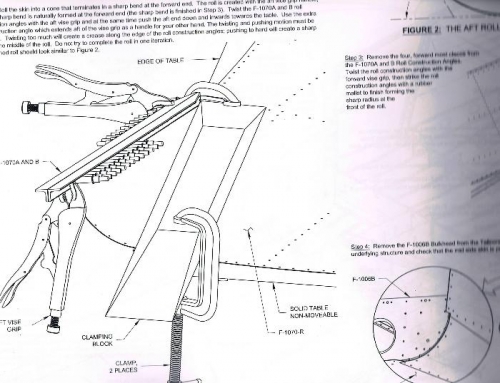
Looks like a Easy Step
|
|
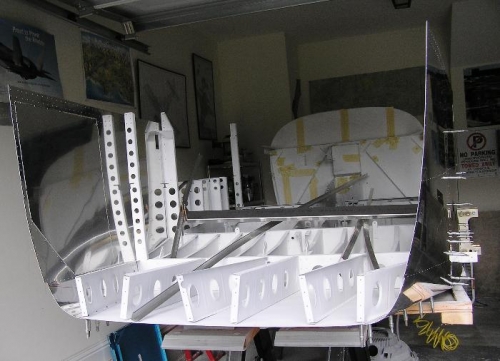
Both Side Skins are Done
|
|
|
|
|
|
|
|
|
Copyright © 2001-2024 Matronics. All Rights Reserved.
|