
|

|
|
|
Conrads X-10 Build Log
|
Date: 7-27-2009
|
Number of Hours: 4.00
|
Manual Reference: Section 25-7
|
Brief Description: Section 25-7 Rear Spar Bulkhead Assembly Steps 1 t
|
|
Section 25-7 Rear Spar Bulkhead Assembly Steps 1 to 4......Step 1, After locating all the parts I Final Drilled #40 all the nut-plate attachment holes and #19 the screw holes to the top flange of the F-1005C –L/R, F-1005C- L/R Bulkhead Side Channel, F-1005A Rear Spar Bulkhead and the F-1063B-L/R Idler Arm Bracket as shown in Figure 2. Step 2, I clecoed all the F-1005B Rear Spar Attach Bars, F-1005C-L/R Bulkhead Side Channels, F-1005D Crotch Strap Lugs, F-1005E L/R Gussets and the F-10063B-L/R Idler Arm Bracket to the F-1005A Rear Spar Bulkhead as shown in Figure 2. Step 3, Disassemble and deburr all the clecoed bulkhead parts. As in the previous section machine counter sunk the appropriate area where the nut plates are to be attached using the AN426-3-4 flush rivets. Machine counter sunk the three lower screws of the bulkhead side channels for #8 screws. Then I deburred, removed the “shinny coating” with sandpaper, clean with acetone and then primer painted all the parts with DTM primer/finisher. Time about 4 hours,
|
|
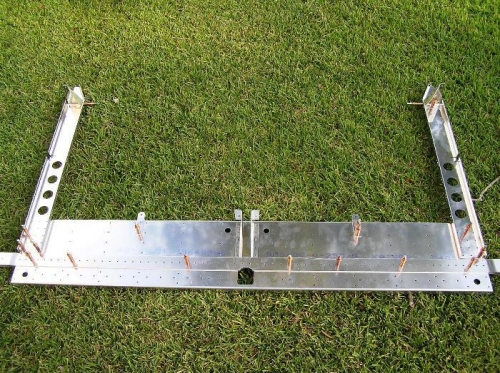
Rear Spar Bulkhead Assemby Cleoed and #30 Final Drilled
|
|
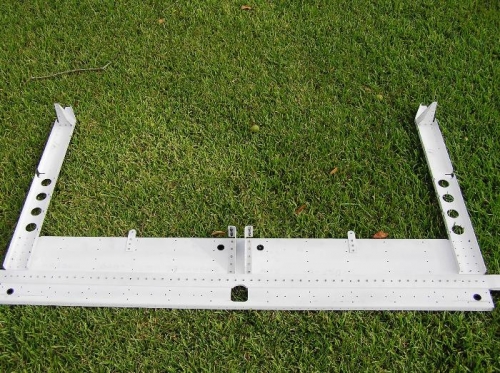
Rear Bulkhead_Riveted_and_Painted_Completed
|
|
|
|
|
|
|
|
|
Copyright © 2001-2024 Matronics. All Rights Reserved.
|