Brief Description: Installed the Windscreen in Process
SECTION 45-18
Sept 6th 2010
Step 1 and 2, These procedures about installing the Rear Windows were accomplished and listed previously as part of yesterdays work.
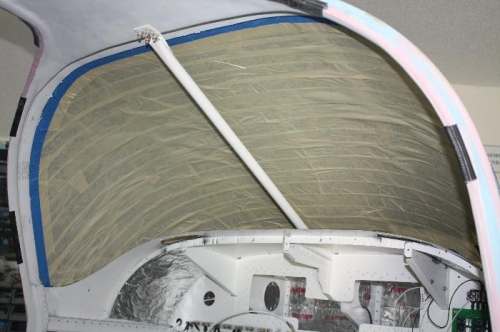
Step 3, Installed the Windscreen today. I began by placing the C-1005 Windscreen on the forward fuselage and final trimming as necessary. This included a final sanding with 220 grit sand paper the edges of the Windscreen for that perfect fit. Shims were not necessary. Continued to remove about ¾ inch of factory plastic coating from where the Windscreen meets the Fuselage and sanded with 220 grit sand paper both sides for a good adhesion fit. Then I placed Duct Tape on the outside and Masking tape on the inside over the factory delivered plastic protective surface. This should provide enough protection while painting and other thing such as hanger “rash”.
Step 4, I cleaned up the edge of the Fuselage lip with acetone. Then after rehearsing with the drying clamps and “bungee” cords I used Weld-On 10 to adhere the Windscreen. After the work I was satisfied and had a perfect fit and used all the kits Weld-On 10 ( I had at least 20 minutes at about 85 degree F).
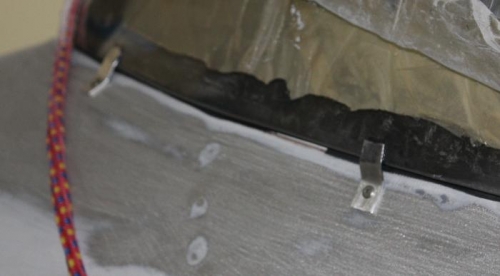
Step 5, I had previously fabricated six clips from scrap 0.032 inch aluminum. See figure 3 for dimensions. These clips are to help secure the side of the Windscreen to the Fuselage skin. The clips are installed every 12 inches with LP4-3 rivets around the perimeter of the Windscreen.
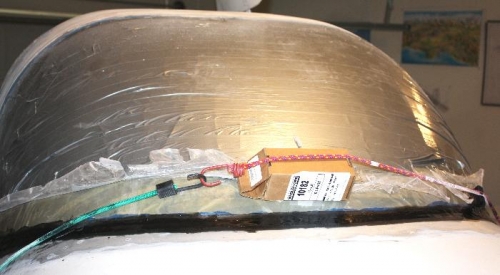
Step 6, I mixed up some Aero-Poxy with micro-balloons and an ounce of black pigment to tint the mixture. This was the first step of creating the Windscreen Base Fillet. This mixture of Micro-balloons and Aero-Poxy was placed between the bottom of the Windscreen and the Fuselage F-1071. See Figure 1 on page 45-19 for details. I am now allowing the work to dry overnight. On top of this is a 10 layer of 9 oz. E-glass fiberglass cloth and Aero-Poxy.
Time about 5 hours.
Micro-Ballons and Aero-Poxy with Black Tint as a Fillet
The Clips Installed Every 12 Inches with LP4-3 Rivets