
|

|
|
|
Serenity
|
Date: 2-7-2007
|
Number of Hours: 2.00
|
Manual Reference:
|
Brief Description: Fuel sender/access plate attached
|
|
This step was to wait until the baffle was installed, but I went ahead and attached the fuel tank float/sender to the access plate, and then attached the plate and gasket. While one would only need to seal the screws, I elected to seal all gaskets with fuel tank sealant. Pic 3 shows a new way I used to apply sealant cake decorator style with a freezer ziplock and a hole cut out in the corner. Thanks to a tip from a couple builders, this method worked well. Rest of time was spent moving all tools and the tank indoors to the basement. It's been down to zero at night, teens during day. It is now taking 3 hours to raise the garage temp from 20 to 55 degrees with 54000 BTU's of propane heat, so into the basement shop! I installed a pneumatic pass-through garage to basement a few years ago, so was able to use that and leave the compressor in the garage. A couple fittings were changed on some hose, and now I have compressed air in the basement for the squeezer.
|
|
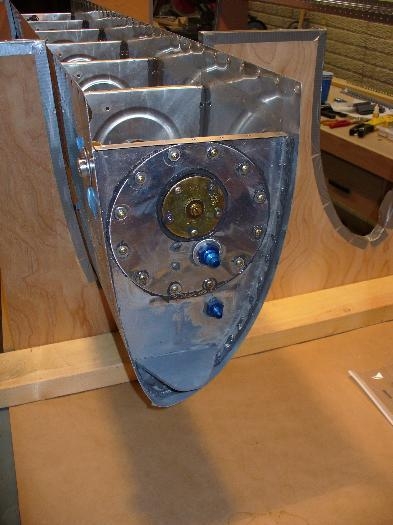
End rib access plate
|
|
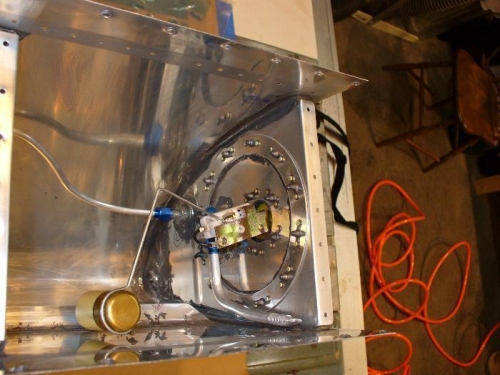
Innards - fuel sender and float arm, pick-up tube, vent line
|
|

|
|
|
|
|
|
|
|
|
Copyright © 2001-2024 Matronics. All Rights Reserved.
|