
|

|
|
|
Serenity
|
Date: 10-13-2006
|
Number of Hours: 3.50
|
Manual Reference:
|
Brief Description: dimpled all parts, primed, started riveting
|
|
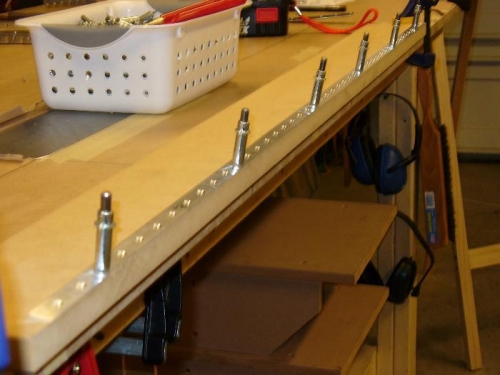
Dimpled all parts, using pneumatic squeezer wherever possible, and DRDT-2 for rest. Countersunk AEX trailing edge. After cleaning parts, primer was applied to non-Alclad parts and mating surfaces. Skeleton final assembly was started as seen in pic 3.Few pointers:1) First pic shows countersinking trailing edge. I used a technique seen on a couple other builder sites, where the TE was clecoed onto a board. All holes were drilled into the wood so the countersink pilot wouldn't bottom out. After one side was done, it was flipped and the same holes were used. A second recommendation - I used the countersink cage in a regular electric drill instead of the Sioux pneumatic. Much slower, and made smoother cuts. 2) Second pic shows the lead counter weight and the associated rib into which it is screwed. You need to dimple both for a #10 (0.19 inch) screw. I didn't have a #10 drill, so I used a 3/16 (0.1875), and generously reamed it - worked well. For the lead counter weight dimple, I lightly pounded a #8 die I had, and then did some light countersinking. For the rib, I used the same #8 die set in the squeezer, then put the screw in along witht he lead, assed washers, and tightened a nut until the screw head was no longer proud of the rib. I will check the nylon locking nut later against a fresh one and a sensitive beam torque wrench to see if the holding power was lost. I shimmed enough washers to keep from engaging the whole nut with the screw thread.
|
|
trailing edge countersinking
|
|
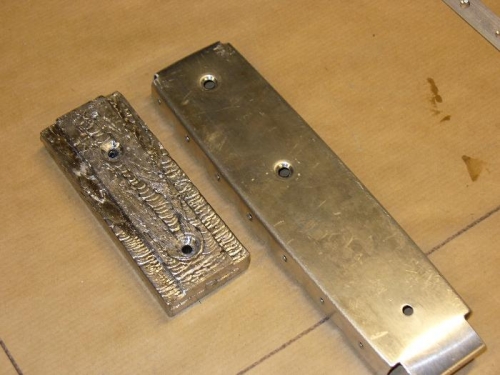
dimpling counterwieght and rib
|
|

starting skeleton final assembly
|
|
|
|
|
|
|
|
|
Copyright © 2001-2024 Matronics. All Rights Reserved.
|