
|

|
|
|
Buck's RV-8
|
Date: 9-30-2007
|
Number of Hours: 3.70
|
Manual Reference:
|
Brief Description: Elevator bellcrank attach angles
|
|
Yesterday, when I clamped the old and new elevator bellcrank attach-angles together, and drilled them, I made an assumption I shouldn't have made. I wrongly assumed the pre-existing angles were made correctly and perfectly. It's easy to get in this mindset with the Quickbuild kit.
I discovered that when the Phillipinos built the attach angles, they must have drilled them into the fuselage, THEN drilled the 1/4" elevator bellcrank holes. This is certainly an efficient method for factory production, but it's something I never would have done myself. Couple this with a somewhat poorly-made set of TruTrak attach angles, and I found that some of the holes in my angles didn't line up very well, even after they were carefully match-drilled to the old angles (see Photo 1). After clecoing the new angles into the fuselage, I discovered that all three holes on the upper part of the angle were off by exactly 3/32".
I decided to fabricate another right-side angle and move the three offending holes forward 3/32". My idea worked perfectly (Photo 2), although I must say that it was interesting and educational trying to get all the holes located exactly where they needed to be, simply by measuring -- not by back-drilling through the already-drilled structures they'll be attached to.
I took care of another attach-angle related oddity: The new, longer elevator bellcrank angles would not lay flush on the longerons because the edge of the nearby bulkhead interfered. A couple of passes with a Dremel tool and some files took care of that.
Finally, I primed all the stuff I did today. A good day.
|
|
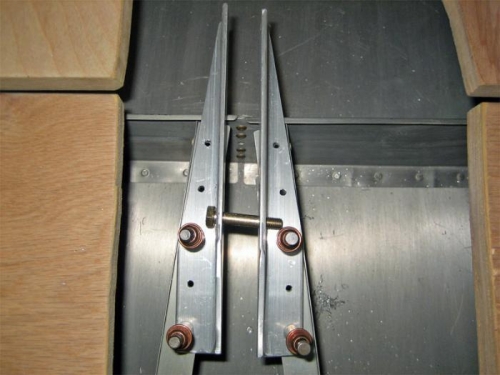
The bellcrank bolt barely went through the supplied attach angles....
|
|
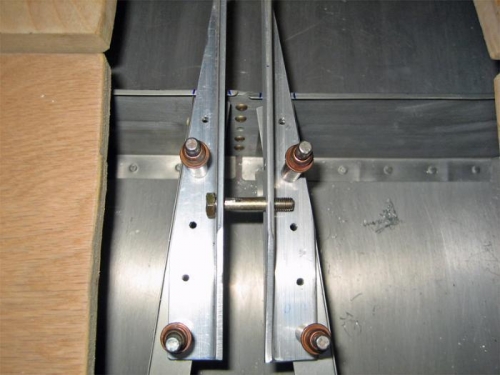
...so I made the one on the left from scratch to fix the problem. Now the bolt slides right though.
|
|

I had to cut off the bent edge of the bulkhead so the attach angles would clear.
|
|
|
|
|
|
|
|
|
Copyright © 2001-2024 Matronics. All Rights Reserved.
|