
|

|
|
|
Barry's RV14A
|
Date: 4-28-2023
|
Number of Hours: 5.50
|
Manual Reference: N/A
|
Brief Description: Back to It - Vacation is Over...
|
|
Back from a short get-away in NYC, it was time to return to repairing the left fuel tank.
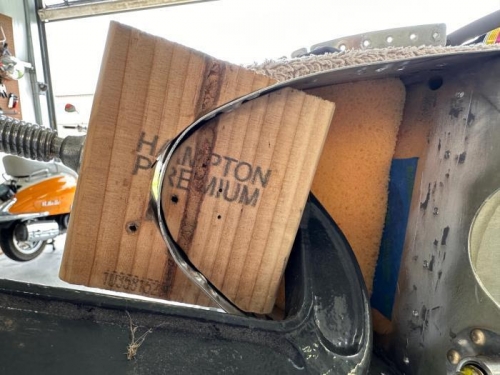
ProSeal is a huge pain to remove when you cannot use a heat gun. It's slow, purposeful work & trying to rush will only cause you frustration. To top it off, sealant debris goes everywhere so the entry to the fuel tank needed to be blocked off to prevent contamination. I found a sponge & a bit of tape did the trick.
With all the rib's rivets, the rib itself & the majority of the ProSeal removed, I began reshaping the leading edge to a similarity of its original self. I cut out a simple leading edge formed compression block & then used a clamp to squeeze the assembly into place. This rough but handy contraption allowed me to slowly manipulate the leading edge to nearly the shape it needed to be.
Seating the replacement rib is going to be challenging. It's a tight squeeze. However, my major concern is with the tank sealant that will be applied to it. Once the rib is in place, there will be no access to the inside of the fuel tank. Placing an adequate amount of ProSeal onto the rib's edges then squeezing the rib into place & expecting enough sealant to still be intact to ward-off a leak, is questionable & an unwise gamble.
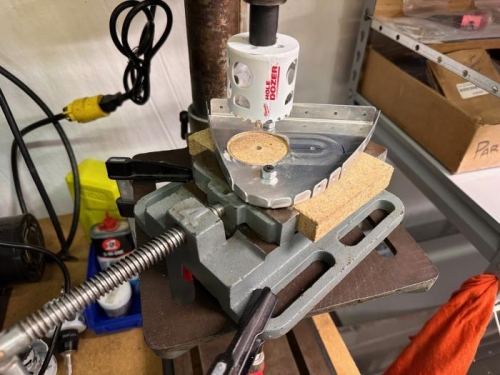
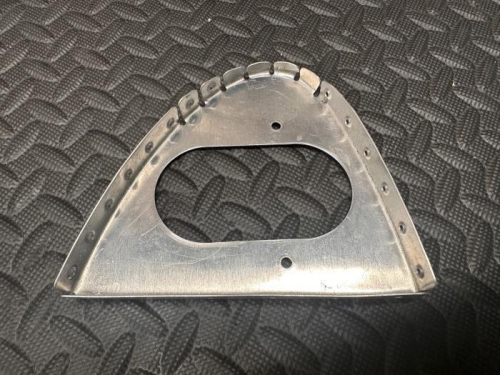
To overcome this problem, I opted to cut an access hole into the rib. The access will allow me to apply ProSeal to the inside edges of the rib once it is installed. Once the sealant cures the access hole will be closed off with a cover plate (doubler). Finally, the entire assembly will be externally sealed & secured, using either blind rivets or nut plates & screws.
Currently, I’m thinking of keeping it simple. Go with blind rivets…
|
|
|
|
|
|
|
|
|
|
|
|
|
|
|
Copyright © 2001-2025 Matronics. All Rights Reserved.
|