The aileron trim servo has 5 wires. 2 white ones are the power wires. Reversing polarity reverses the servo motor. The other three are for sensing. The servo wires are only about 4 inches long so I soldered each one to the wire run and added shrink wrap (slip it on before you solder the connection). I also added a larger shrink wrap tube to the wire run. That larger one covered the five individual shrink wraps underneath it. Put a grommet in the nose rib tooling hole closest to the aileron spar. If you are making a D Sub connection out at the wingtip, then just cut the wire so you have a run of about 3 feet from the servo. On the end of that 3 feet, slice, crimp 5 D sub pins but don't put them into the connector yet. If you are doing the work in the house like me, you want to put the servo back into the aileron and thread the wire through that grommet (one or two pins at a time. Do the last pin by itself as its a little snug, but it goes through). Pull the wire run through that grommet and now that the end is outside the aileron, insert the pins into the D sub connector. Note on a piece of paper which color wire went into each hole. You need to match up those same wires when you put the other connector on the end of the main wire run. (Pictres below of main wire run connector). What did I learn? Order machined D sub pins and use the other style crimper instead of crimp pins. The machine pins get squeezed from 4 directions in a simpler tool. Sort of like squeezing cable tv antenna. Crimped D subs are OK, but I think I will like the machined ones better. Don't just plow ahead with putting the pins on unless you have your other stuff on the wire ahead of time, like shrink wrap or grommets. Don't overly bend the wire coming out of the sheathing where you make the D sub pin connections. It can and will break and then you will cut everything you already did off, strip off more sheathing and start over.
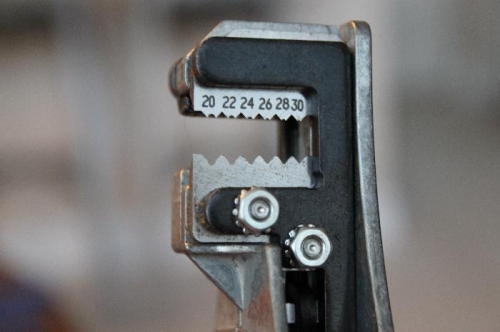
This Ideal stripper worked perfectly.
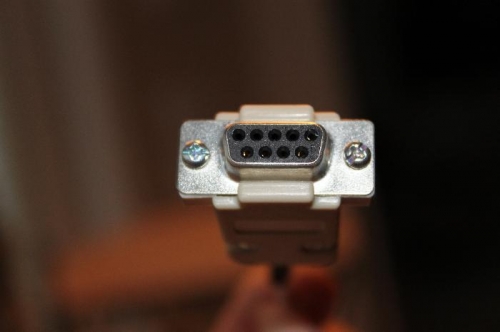
Assembed connector. Pins are in the bottom row and 1 in the top right row.
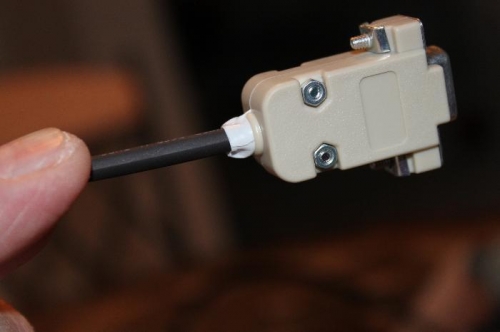
White electrical tape fills up the space in the rear exit hole. Black shrinkwrap for strength.