
|

|
|
|
Pete's RV-8 Web Site
|
Date: 12-30-2009
|
Number of Hours: 4.50
|
Manual Reference: 7-2
|
Brief Description: Prepared starboard rear spar for assembly
|
|
First task in the shop today was to tap the tie-down bracket. Tap used was 3/8-16 per the instruction manual. Next, it was on to preparing the rear spar.
The rear spar "Z" channel was marked (top, bottom, inside, outside, root, and tip) and the protective plastic was removed from appropriate areas leaving as much as possible in place to protect the aluminum while it is being worked. The doubler plates and the reinforcement fork were all deburred (edges). The thin pieces were done on the scotchbrite wheel but the thick components were first filed and then polished with scotchbrite.
The reinforcement plates and fork were clamped/clecoed in place and match drilled. The hole for the aileron push/pull tube was drilled/cut with a Unibit and Dremel tool. By the way, I found that by mounting the Unibit in a drill press and running about 1600 RPM, you can carefully move the plate around to nibble the irregular hole. The entire hole can be cut this way requiring just a little clean up with the Dremel tool and emery cloth. It makes a very neat job.
All match drilled holes were deburred, the components were cleaned, scotchbrited, and primed. The tie-down bracket components were also primed. I have a couple final steps to complete on the spar "Z" channel and then it will be time to rivet.
|
|
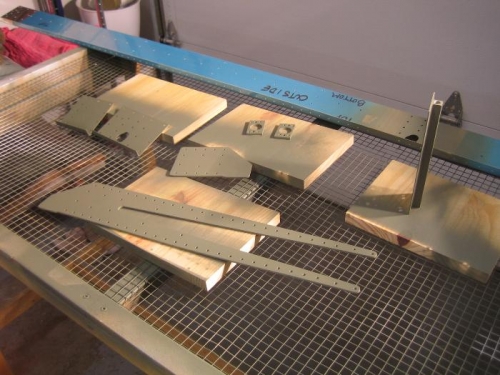
Rear Spar Parts Primed
|
|
|
|
|
|
|
|
|
Copyright © 2001-2024 Matronics. All Rights Reserved.
|