This is one of those tasks that really doesn’t feel that rewarding because you can’t drag anyone into the shop and say, “Hey, check out what I did! Pretty cool right?!” The problem is that it looks exactly the same when it’s done as when I began. Such is the life of wiring the collective and the cyclic.
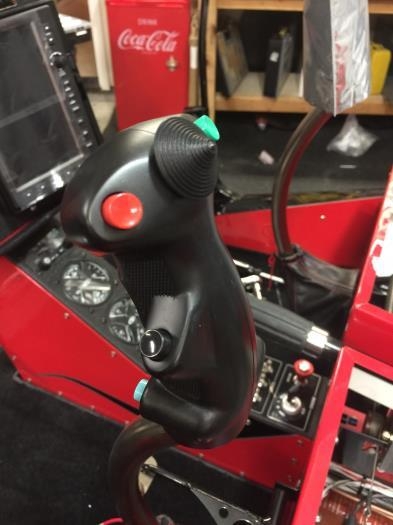
The cyclic wiring is actually cool because the cyclic handle comes pre-wired from the cyclic manufacture. Unfortunately, the Safari manual conflicts with itself regarding what the wires control. I did a little research online and found that the company that makes the handle also provides a PDF of the entire cyclic system including if the button is an “on/off” like a light switch, or a temporary power switch that would be used for something like an Ident or radio flop button.
For the Cyclic, I wired the buttons as follows:
Green Button: Transponder Ident Blue Button: Landing Light Black Button: Radio Frequency Flop Switch Red Button: Cabin Heater Fan Hat Switch: Cyclic trim Trigger Switch: Push to Talk (PTT)
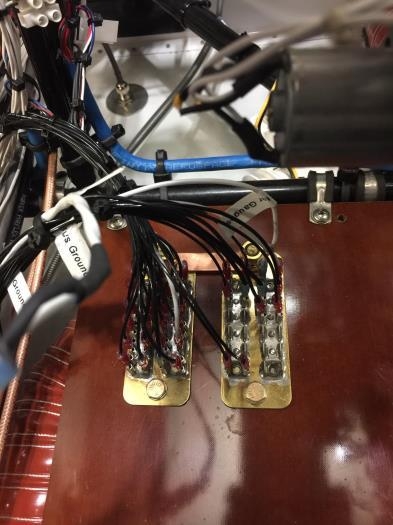
I ran all of the wires from each cyclic to a common buss, then ran each of the individual uses to one side of that bus. The access for the bus is good since I copied how Safari has done on their ships, and mounted it to the upright seat support. It’s a good central location and easy to work on.