I got the interior ribs for both tanks sealed up. I am using the fay surface process that has been well documented on VAF (http://www.vansairforce.com/community/showthread.php?t=7602&highlight=fillet+seal). With this process the parts are assembled with sealant, 100% clecoed, and then left to set up. Once the sealant has fully set (or even partially cured), you come back and dab the rivet holes with sealant and rivet. The advantage is less mess and stress trying to do everything at once while covered in pro seal.
I started the day by scuffing up the rib flanges with metal prep and a scotch brite pad. I then wiped them down with MEK and did the same with the rib lines on the skins again.
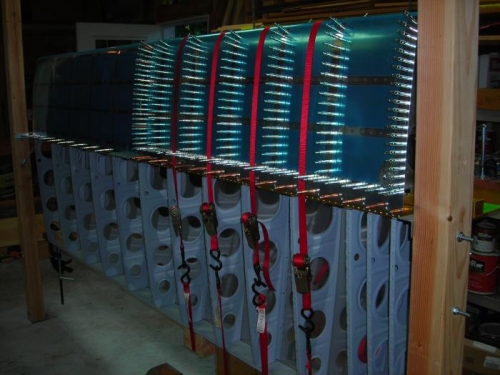
As other builders have done with this method, I applied sealant to the flanges of a rib, and then clecoed it to the upper skin with the five most forward holes while the skin was lying open on the table. I found that the easiest method for doing this was to insert the five clecos in the skin first, mate up the rib with these clecos and then reach around and insert each cleco fully into the rib. This seems to work good when you can’t see to line up the holes with all the sealant in place. Five clecos gets the rib pretty well straight and lined up with the rivet line. Once all the interior ribs were attached this way, I also clecoed in the two outside ribs (without sealant of course). The next step was to insert this wobbling assembly into the LE cradle, and then start inserting clecos on the aft side of the tank starting at the front. The process was to bear down on the aft edge of the rib to push it into position and then insert a cleco. This worked pretty well in most cases. Adjusting the lateral alignment was usually the problem if there was one. The sealant acts as a nice lubricant for getting the rib pushed all the way forward against the skin. Once there was one cleco in the rest were easy. Every hole for each interior rib was eventually clecoed.
From my builder research it appears most folks stoppe
Tank 100% clecoed and strapped down until the sealant sets up