I spent all day bending the end tabs on the trim tab skin. I didn’t find a lot of detail on this process in other builder’s logs I researched , so I’ll do what I can here for someone else down the line.
I marked both ends to identify the lower flange. The lower flange is bent up first, and the upper flange then bent over it to keep it from collecting water and crud.
I did my best marking the bend line. Of course the bend line is determined by where you position the bending blocks.
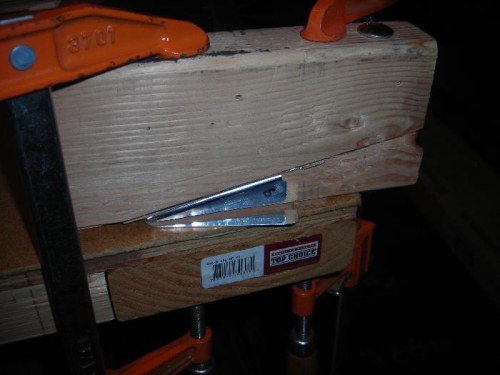
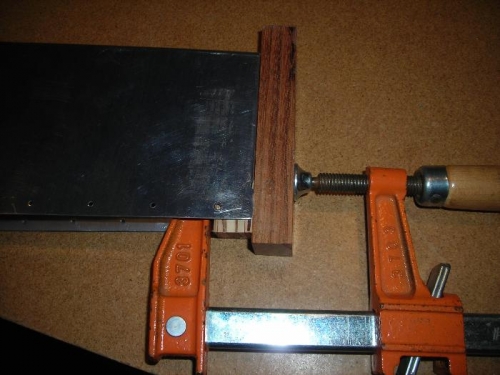
Started with the smaller outboard side. For the elevator skin tabs, I had used some scrap cherry flooring because it is a very hard wood. It was only 1x material though and I do not recommend it because of the thickness. It does not give enough room for the clamping. I was thinking of doubling up a couple pieces but decided to just go with a Fir 2x4 scrap. The angle I used was about 12.5 degrees. I cut one piece of wood and used both pieces in the clamping of the bend. I chose the sharp cornered edge created by the saw to go under the bend. I did not radius the edge as Vans calls out.
I put a through hole in both pieces of the block for a 3/8” bolt to help hold the two blocks together during the bending process. I saw this tip in the VAF forums. I also used double sided carpet tape between the tab and bending blocks. It’s tough to get the blocks in the right location for the bend line with the tape in there. It took a lot of messing around before I was happy. Finally, I clamped the hell out of it.
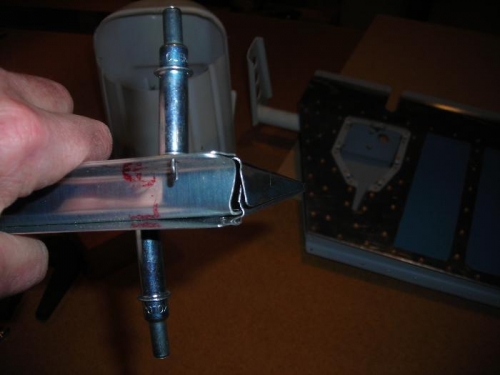
Went at it first with a block of wood and a hammer. Lesson learned was to use a piece of wood that is as big as the tab to keep the beating effect somewhat consistent across the tab.
The flush set in the rivet gun turned way down low does a nice job on finishing the bend.
It is a little tough disassembling with the double sided tape. Some solvent could be used to dissolve the glue if necessary. I needed to flip the block for the second bend to utilize the nice sharp corner created by the saw.
Repea
Out board side clamped up (note thru bolt) and bottom flange bent