Brief Description: Plumb wings, drill and cleco ribs
I spent a lot of time making sure everything was plumb and jigged secure and straight. I probably spent more time than necessary but I don't mind taking the extra time for this.
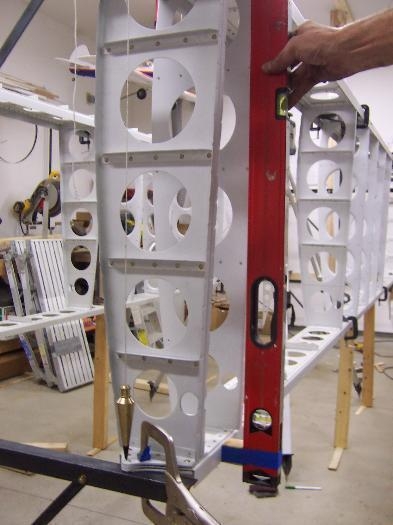
I positioned and clamped the wing attach holes with a .300" offset. I also made a reference line on the rear spar at both ends for a plumb bob reference. I also used a 4' level with a 1-3/8" block taped to one end to check alignment of the spars. Holding the block to the rear spar the level should show level.
Once everything was correct the last thing I did was I made a diagonal measurement of the spar box on both wings from end to end to check for square. That looked good so I drilled a hole and bolted the rear spars to the jig.
I intentionally bumped the jig around a bit and rechecked everything. It looks like redoing the jig was worth the time - nothing moved even with some solid bumps.
I rechecked the flap drive for free movement then drilled the holes for the support frame into the spars.
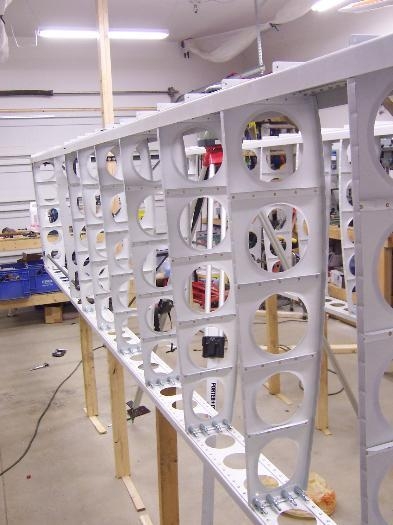
I measured the spar spacing for 32" with the ribs in place. I did need to trim about 1/32" off a few of the center ribs with the deburring wheel. Once everything measured correct I rechecked for straight spars and checked the plumb bob at both ends then drilled and clecoed the center ribs to the rear spar attach angles.
To drill the holes I used a 6" bit. This seemed to work well and allowed enough room to hold the drill between the ribs while in position and had enough flexibility to drill a straight hole though the ribs.