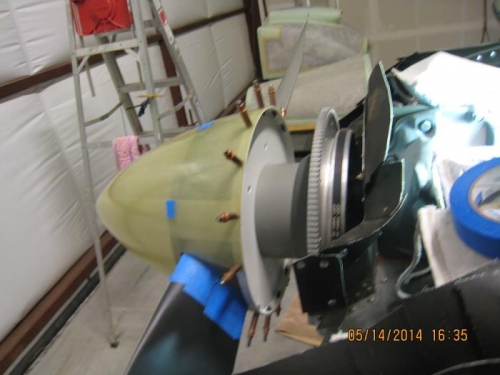
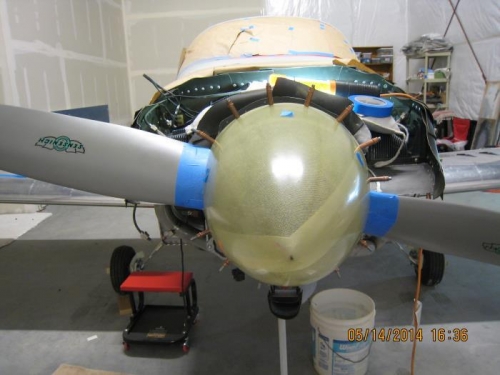
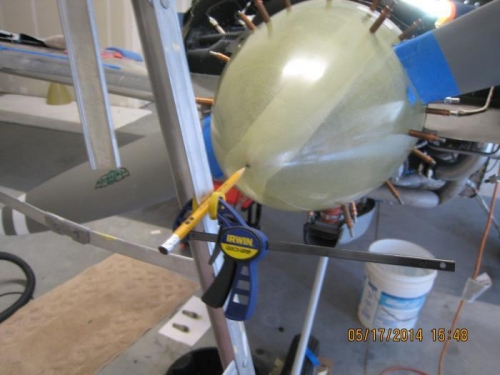
After being out of town for the better part of the winter I had to take a good 2-3 days to get the hangar back to shape and the tools organized. Today I started with the fitting of the spinner. I have already installed the propeller without applying torque and safety wiring to the bolts. The prop will have to come off at least once. I have previously made the cut out in the spinner cone to match the contour of the prop blade. Checked the fit between the front and back plate and the spinner. They came out perfect. The next job is to align the spinner with the axis of the crankshaft. I installed the spinner on the prop using rough alignment then clamped the spinner to the back plate. Marked a point in the exact center of the nose of the spinner. Using a step ladder with a pencil clamed to it, placed the pencil point near at the point marked on the spinner center. Removed the spark plugs and rotated the prop 360 degrees adjusting the spinner to keep the pencil point and the marked point on the spinner in alignment. This had to be repeated until a good alignment was achieved. After the alignment was good I drilled the spinner to the back plate, re checking the alignment repeatedly as I drilled. Clecoed each hole as I moved around the spinner. Looks good; I hope it will stay that way. I record this on the 14th of May, but the job took two days.