Brief Description: Painted the Boot Cowl and Trim Tab.
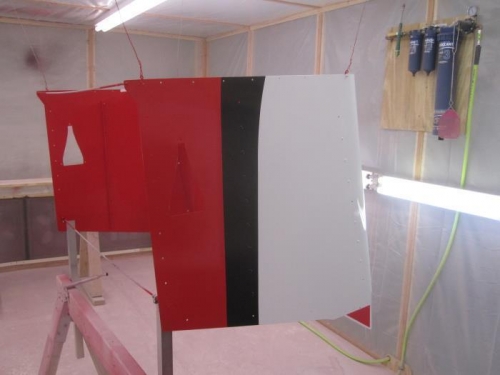
I had a template made for the stripes on the boot cowl. The hard part was bridging the gap where the doors will be installed.
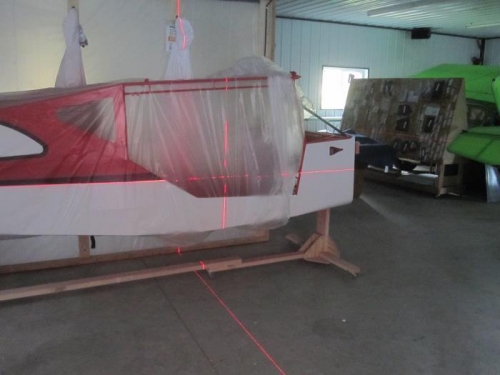
When I developed the templates I made sure the stripe consisted of straight lines as it crossed the door, so this made it possible to use a construction laser to locate the boot cowl template relative to the stripes painted on the fuselage.
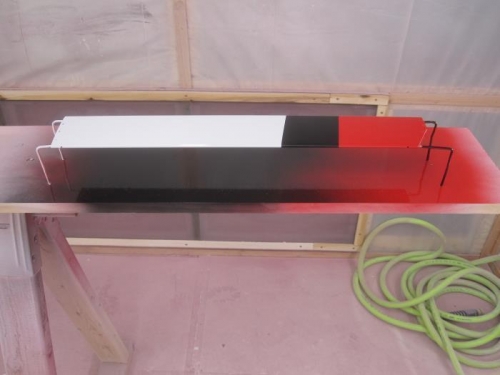
I stole Mark P's method of mounting the two trim tab halves to a board, which also allowed them to be flipped so I could paint both sides while they were in a horizontally flat position. See his S-6 build log on RANSCLAN.com for details. I did use a 3D printer at work to make some plugs for the open end of the trim tabs to help hold the wire in place. I would imagine shoving some crumpled up paper in there would be just as effective.
I wanted to paint the inside of the boot cowl, and although I thought about developing a fixture that would allow me to rotate the cowl so I was always painting horizontally, I decided the fixture would get really complicated and be tough to work around when painting the inside, so I just hung it from the ceiling. I also made a couple brackets to attach the bottom to a saw horse to keep it from blowing away while spraying.
A couple of handy hints would be -- I used small "S" hooks through some rivet holes to hang the cowl, and two 36" long 1/8" threaded rods to stabilize and hold the open end. I was lucky enough to find that the rods threaded lightly into the 1/8" rivet holes, so nuts were not needed. I used small "P" clamps and some angle to attach the rod to the saw horse.
One other item I would mention - I painted the outside of the cowl white first, then masked off for the red using paper. I realized about half ways through the process that the red on the inside would go through the rivet holes and make a mess on the white (under the paper), so I had to remove the paper and put tape over all the rivet holes - Whew! - That would have been a mess!