
|

|
|
|
RV-7A Construction Log
|
Date: 3-30-2008
|
Number of Hours: 4.00
|
Manual Reference:
|
Brief Description: Aileron-Starting Ex 2 Aileron Part
|
|
I started the second exercise this weekend. The instructions are better. I'm beginning to see the routine is: 1) Debur, 2) Cleco and Drill, 3) Debur, 4) Cleco and rivet. Somewhere in here I need to prime. I learned use rivet tape because it holds the rivets in, keeps the rivet gone from walking around, and prevents marks and discoloring of rivets and skins. And rivet tape can be used more than once. I'm also a little suspicious that if you are only drilling matched holes to full size that you don't really need to cleco every other hole. I see the need for match drilling and riveting. My rivet technique evolved to: get bucking bar lined up, then watch the rivet gun while pulling the trigger, and "feel" the bucking bar smash in the rivet. This allows you to focus more attention on keeping the rivet gun perpendicular to the surface, and dead center over the rivet head. I also learned to dimple then countersink on metal that is to think for just counter sinking. I think my dimples for the flush rivets are good, but if you see otherwise, please email me with description. I'm still taking the class in mid May. My brother Ed just sent me some video tapes for building the empennage. I’m not done yet, due to I don’t have a squeezer. Avery and everyone is sold out due to the EAA show at Lakeland FL. So I hope to finish this next week. If not I’ll work on the tool box.
|
|
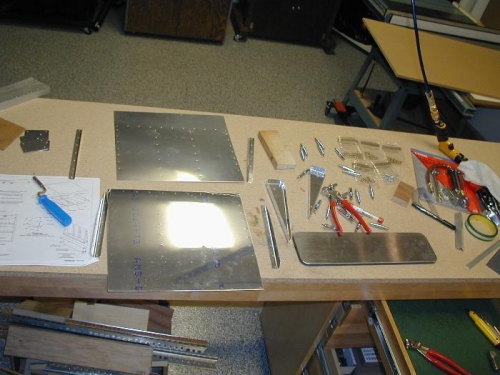
Aileron Piece
|
|

O, here I am.
|
|
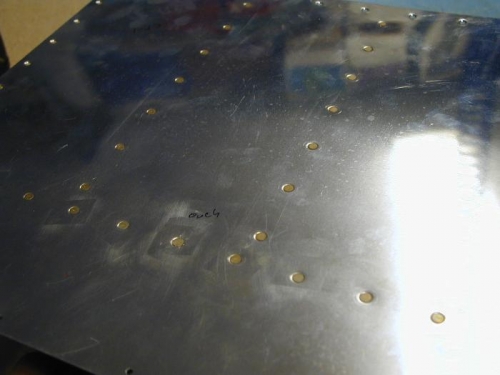
Are these okay?
|
|
|
|
|
|
|
|
|
Copyright © 2001-2025 Matronics. All Rights Reserved.
|