Brief Description: Main Skins - Clinched Rivets Issue 3
This time we used the forward riveting process and it worked much better. We used the flush rivet set and bucking bar. The results are excellent. You can even see where the clinch foot had been under the new perfect shop heads.
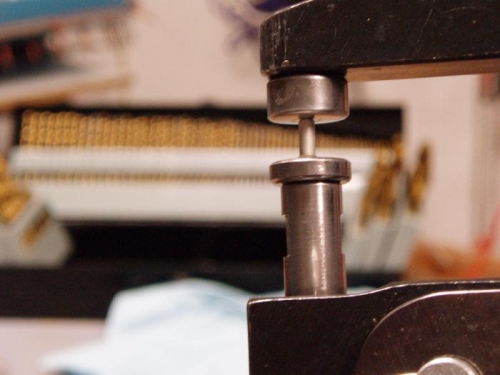
One thing I did was to pre-squeeze some longer rivets down to -4 (4/32) length. This gives them slight fatter shanks. I set my squeezer to squeeze down to length of 4 (4/32). Then I put a 4.5 or 5.0 length rivet into the squeezer and squeeze it down. This swells the shank. So instead of having a 3-4 rivet per plan I now use a 3.3-4 rivet which is .3 fatter. If you need a fatter rivet start with a longer one. If you only need a little extra thickness use a rivet only .5 longer. The procedure ensures the right final length or reveal so that the problem of bending or clinching is reduced.
Most of the holes did not enlarge and so we didn't need to many fat rivets. We got this whole re-rivet job done in one day and now I feel much better about it.