
|

|
|
|
Sid & Houston Mayeux Project
|
Date: 12-17-2011
|
Number of Hours: 3.00
|
Manual Reference: Roll Bar
|
Brief Description: Finished/primed, assembled/rivited the roll bar
|
|
After deburring, countersinking specific holes that will require flush rivets, and priming, I riveted the roll bar. This took a surprising array of riveting techniques:
- For flush rivets, I riveted the inner/outer straps to the forward channel with the pneumatic squeezer.
- For flush rivets through the forward channel's center attach plate, I back-riveted into my1/2inch-thick steel plate.
- For AN470 standard rivets through the rear channel's center attach plate, I again used the pnematic squeezer.
- However, for AN 470 standard rivets through the reach channel's attach plate AND the rear fuselage mount brace's mounting angle, I used the hand-bucking/rivet gun method.
- Finally, I filled the rear channel and inner/outer strap holes with CS4-4 pop rivets.
Almost 10 hours just to build the roll bar. At first it seemed to me like an aweful lot of work. But as I thought about the importance of this component's sturdiness and reliability for safety, I slowed down to be sure I don't introduce ANY weakness into this structure. It'd likely only be used once (and I'd rather not have to use it a all), but I want it to work...and work well.
|
|
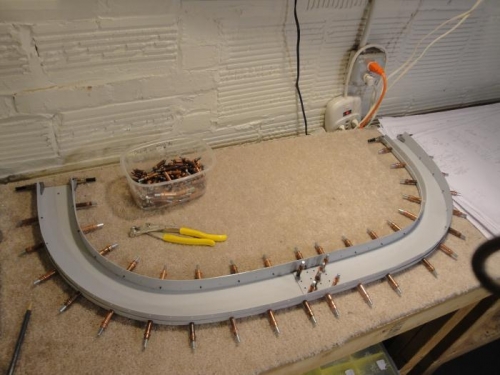
Cleco'd, ready for riveting
|
|
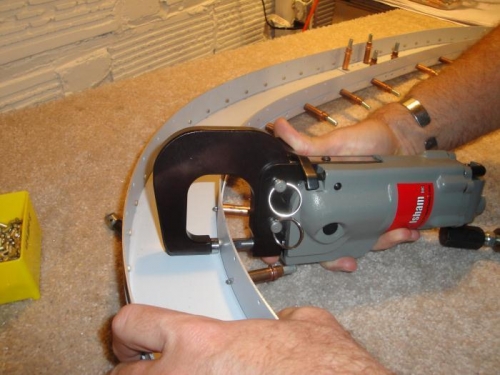
Flush Rivets going in
|
|
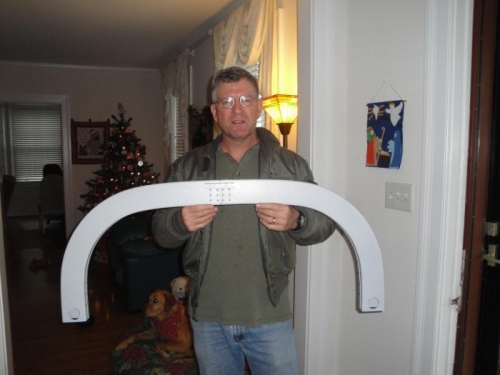
Finished, ready to mount into the airplane
|
|
|
|
|
|
|
|
|
Copyright © 2001-2024 Matronics. All Rights Reserved.
|