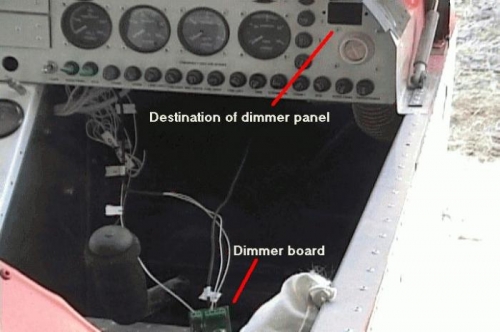
The dimmer board checked out beautifully, but it was now time to mount it in the panel. What a nightmare!
1) Determine location - right side, existing hole. 2) Create panel to mount in location selected. Board will mount to panel by shaft of dimmer controls. 3) Cut from aluminum stock; drill and debur. 4) Prime, paint, decal. 5) Check fits - OK. 6) Mounted panel to instrument panel with 6-32 aircraft screws and locknuts. 7) Check mounting of dimmer board - interference with fresh air vent clamp and depth of instrument panel. 8) Rotated fresh air fent clamp by removing and reinstalling - took excessive time. 9) Checked dimmer board again - still won't fit flush to panel, although it did on bench. 10) Modified dimmer board by removing etch strip along front of board, replacing it with a jumper. 11) Cut approx 3/16 from front of dimmer board. Now fits OK! 12) Wired dimmer board to aircraft. 13) Mounted dimmer board. 14) Laced wires into bundle & snap tied. 15) Checked dimmer. Eyebrown lighting good; instrument lights don't seem to work. 16) Check terminal board and grd for instrument lighting. Need to think problem over. 17) Updated electrical drawings and wiring list to reflect dimmer.