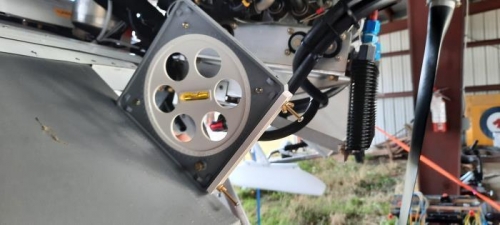
Chapter 39 of the SeaRey LSA assembly manual tells you how to install the actuator and how to hook up the factory wiring harness. But I bought my Aircraft Components Inc. harness through John Dunlop at Canadian Light Amphibians along with the e-Flaps (Searey flap controller). So the relevant manual to follow once the actual flap acuator is installed is the the installation manual that comes with the e-Flaps components from CLA. And, as I found out it is really important to follow this manual exactly, step by step... or you will waste a lot time and maybe risk damaging something. The electric e-Flaps uses four push buttons to select either full UP (0 degree), position 1 (13 degrees down), position 2 (24 degrees down), or position 3 (35 degrees down). First step is to put the e-Flaps into manual mode (see the manual as to how) and then to use a voltmeter to measure the range of voltage from full up to full down on the three wires from the flap position sensor. Once that checks out you now position the flap where you want it for full up and 'lock it in' by hitting the position 3 and the UP buttons simultaneously. This position of the flap is now the reference position of 0 degrees. As shown in the first photo I used the "Warp Drive Professional Protractor" that came with my prop for the flap position measuring exercise. Then adding 13 degrees to the protractor wheel, you lower the flap to the desired position 1 indicating by the protractor bubble leveling out and hit the 3 and the 1 buttons to lock the position in. Similarily for the next two positions as described with great detail in the manual. Not so hard when you follow the instructions... reminder to myself.