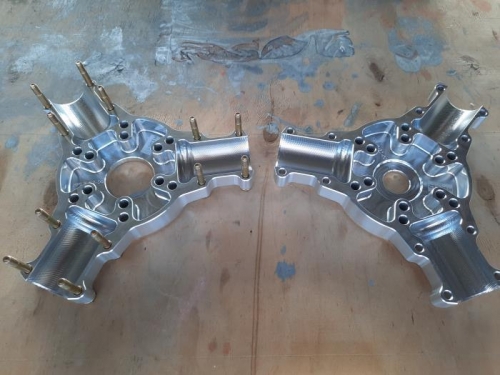
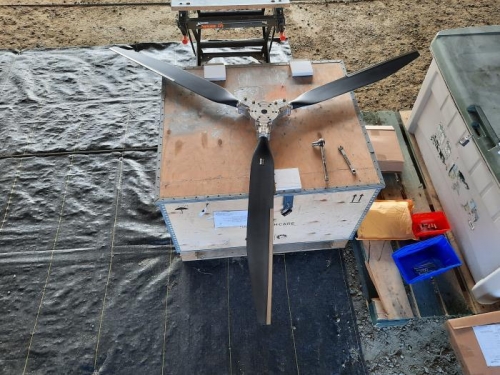
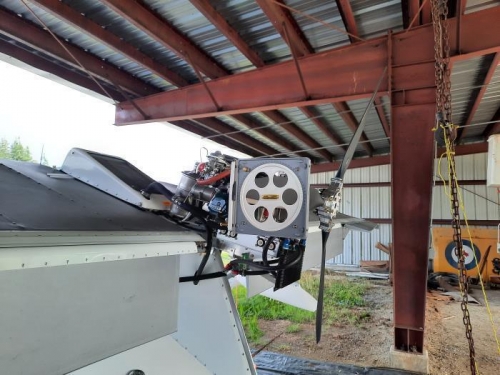
I purchased a constant speed 68 inch-LH-c03HRC-Ni-Taper propellor directly from Warp Drive. Assembling and installing it was a fun job as it went relatively quickly, the instructions made sense and I could see substantial progress in just 2 work sessions. My prop has nickel leading edges and also came with some lengths of Stoneguard tape to supplement them. I left the Stoneguard installation until later. I had to be mindful that my SeaRey is set up with a "pusher" engine arrangement when inserting the clamping bolts into the hub half marked "BACK". I don't plan to install a "Spinner" on my prop, so didn't have to worry about those mounting instructions. Different than the PA LSA instructions my prop did not use Propellor Shaft Nuts (used instead Drive Lugs), or need at Propellor Stud Installing Tool. Also, the Warp Drive Mounting Hardware were 8 mm mounting bolts without drilled heads, as opposed to the PA mentioned 5x75 w/Drilled Heads Bolts. I found that there are actually 12 holes on the bolt circle for the six mounting bolts. Rotating the Face Plate allowed these 6 to line up in the available 12. As my plane is a tail dragger it sits on the ground with the installed prop angled back14.25 degrees from vertical, as measured with the Warp Drive supplied protractor. Checking with Warp Drive by e-mail I decided to start with a prop blade pitch of 12 degrees, meaning the difference was 2.25 degrees for the purpose of setting the intitial blade pitches. I tightened all the bolts snugly, but left the torquing until I am ready to try the engine for the first time.