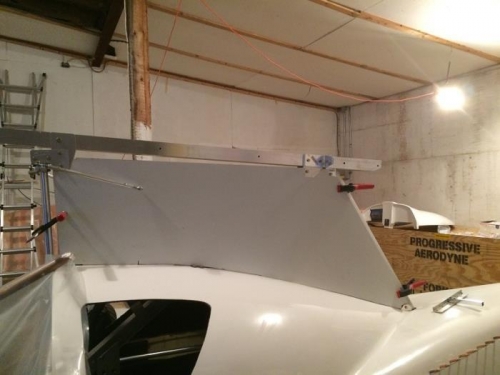
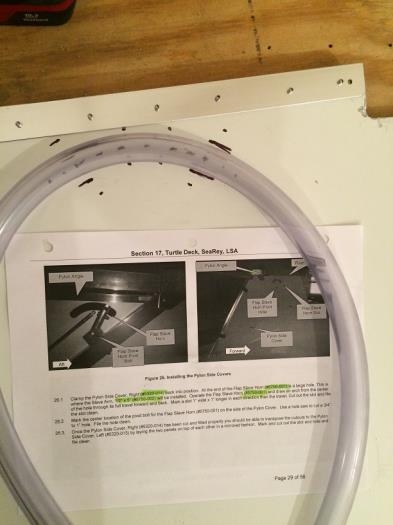
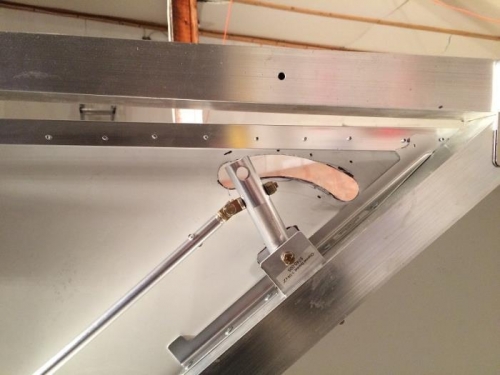
For installing the Engine Pylon skins I consulted both the new manual Chapter 17 and the old manual Section 17. Both were useful for working out all the details but neither was perfect. Placing the two skins into position and then slowly trimming away the excess material to fit the contour of the Turtle Deck and the various impediments of the aluminum Pylon structure took a lot of fiddling, consulting the manuals, disassembly, trimming, re-assembly, swearing, band-aiding, and so on. I found a piece of clear hose made a nice 'French Curve' for marking out othe opening in the co-pilot side skin for the Flap Slave Arm. There are some distinct differences in how to install the aluminum angles that fit on the top of each skin between each manual. Rather than give specific direction I suggest you just assemble as much as you can without cutting or drilling anything, just use clamps, until you are absolutely sure you understand what the final product has to look like and why. This especially goes for the co-pilot side skin which has the inspection hatch in it. I only 'kinked' the trailing edge of each skin not seeing the reason for doing the front edges. Turned out ok for me.